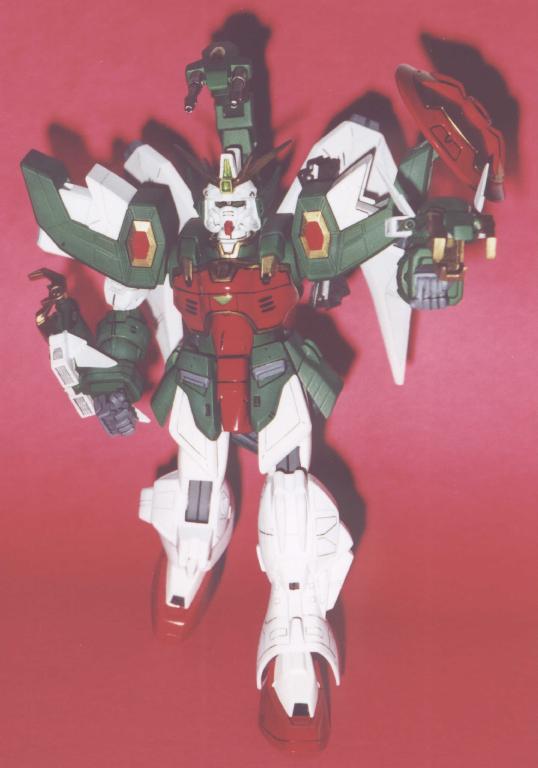
Bandai’s 1/100 Gundam Wing Altron Review
and Photos
Here’s
my Review of the 1/100 Gundam Wing Altron.
Maybe not the most popular kit, but it can be a lot of fun. It’s also the first Gundam model I have
seriously worked on (other than 144 snaps).
I'll be putting some pics up on my website fairly soon to go with this
article. Prior to Gundam, I have about
25 years of model experience. I am a glue-putty-paint modeler, so some surface
issues such as knit lines don't bother me.
I am much more interested in overall fit and finish so I don't kill a
couple weeks waiting for putty or white out to dry. Since I came from the AMT/ERTL Star Trek (shudders with horror)
background, I was initially very impressed with the Gundam kits (the parts
actually fit together and panel lines actually match up). So, coming from that background, here goes
(please feel free to comment;):
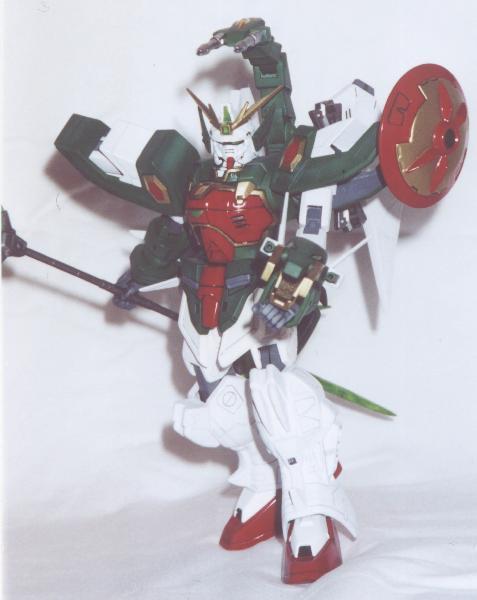
Overall: The plastic captures the shape and proportions, to my eye, very
well. 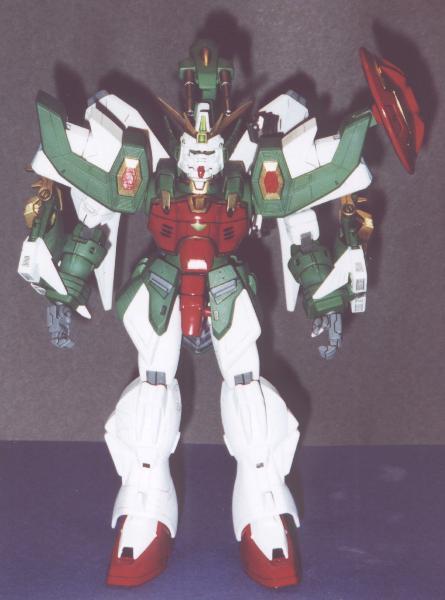 Especially looking to the Wufei/Treize
duel in the second to last episode, Altron is well captured. There are a few detail problems (lack of,
not incorrect), which I'll go into later. Like other GW kits, color molding is
fairly accurate with a few exceptions.
To be accurate with the T.V. appearance, gray parts should be
white. Also, the base parts of the
Altron shield should be on the red sprue, not the green sprue. Since I was planning on painting the kit,
the in-color molding isn't an issue to me. A chromed sprue with gold tinting on
one side is provided for the V fin, dragon fangs and jaws, the Altron shield
top and chest trim. One sided--gee,
thanks Bandai. This makes it impossible
to look good, since from most views the non-tinted sides are visible. Of course, highly visible sprue scars (the
base plastic is black under the chrome) are also sprinkled in. This is
especially true with the dragon fangs and V fin. Stickers are provided for the fangs, but look like crap. That sprue was dumped into the EZ Off
pronto. Detail and molding are fine.
There are a lot of fine panel lines (not going to comment on "too
many lines" issue; personal taste).
The parts are flash free, and there are few noticeable surface flaws IF
you plan on painting. If you do not
paint, then you'll notice all the knit lines in practically every part. The worst detail areas are the inside of hip
armor skirts, which are fairly rough and undetailed. This can be spruced (get it--"sprue"ced) up with strip
styrene to form an internal framework.
There are a number of areas that are “hollow”, such as the fangs, the
head fins etc,
Especially looking to the Wufei/Treize
duel in the second to last episode, Altron is well captured. There are a few detail problems (lack of,
not incorrect), which I'll go into later. Like other GW kits, color molding is
fairly accurate with a few exceptions.
To be accurate with the T.V. appearance, gray parts should be
white. Also, the base parts of the
Altron shield should be on the red sprue, not the green sprue. Since I was planning on painting the kit,
the in-color molding isn't an issue to me. A chromed sprue with gold tinting on
one side is provided for the V fin, dragon fangs and jaws, the Altron shield
top and chest trim. One sided--gee,
thanks Bandai. This makes it impossible
to look good, since from most views the non-tinted sides are visible. Of course, highly visible sprue scars (the
base plastic is black under the chrome) are also sprinkled in. This is
especially true with the dragon fangs and V fin. Stickers are provided for the fangs, but look like crap. That sprue was dumped into the EZ Off
pronto. Detail and molding are fine.
There are a lot of fine panel lines (not going to comment on "too
many lines" issue; personal taste).
The parts are flash free, and there are few noticeable surface flaws IF
you plan on painting. If you do not
paint, then you'll notice all the knit lines in practically every part. The worst detail areas are the inside of hip
armor skirts, which are fairly rough and undetailed. This can be spruced (get it--"sprue"ced) up with strip
styrene to form an internal framework.
There are a number of areas that are “hollow”, such as the fangs, the
head fins etc, 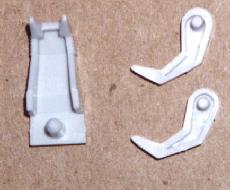 that can be filled in with sheet styrene
or putty to improve them. PV cap coverage is great to poor. The knee PVs are well hidden, as are the
other leg/torso PVs. The dragon fangs
and arms are a mix that unfortunately doesn't work well. The worst PV implementation is in the twin
beam cannon--just butt ugly. More on
the problems later.
that can be filled in with sheet styrene
or putty to improve them. PV cap coverage is great to poor. The knee PVs are well hidden, as are the
other leg/torso PVs. The dragon fangs
and arms are a mix that unfortunately doesn't work well. The worst PV implementation is in the twin
beam cannon--just butt ugly. More on
the problems later.
Arms: I
suspect the extra cost for this kit is due to the dragon arms. It is not money well spent. If you build this kit from the box, the
dragon heads are hollow shells attached to floppy arm segments that will obey
only gravity, not your posing desires. Starting at the shoulder there are the
huge shoulder guards, the left one mounting the superfluous shield. Under the shields are dragon arms (which is
why the guards are so huge). The upper
1" section joins to the torso, and has a mid-point PV axial rotating
joint. If you are painting the kit,
keep in mind the white upper arm is trapped between the dark green shoulder
guards. I painted the arm bit white
before assembling and painting the guards.
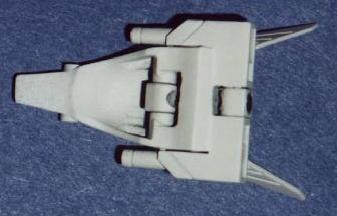
One more note about the shoulder guards: the are wide open on the interior and exterior sides. They are supposed to be open on the outside
so Wufei can do the "No-look dragon fang head crusher" move. On the
torso side, the guards shouldn't be open.
Some thin sheet styrene to wall it off fixes that.
Before and after shoulder shots
The
upper 1" section is joined to the next 1" section by a PLASTIC
link. This link allows the arm to fold
up or extend straight out, in theory.
In practice, the link creates a plastic-on-plastic joint that will
either wear out quickly, or just be loose to begin with. In Bandai's defense, a PV link would
probably sag if the dragon arm was fully extended. A simple fix from Bandai would be PV rings to insert between the
plastic pegs and plastic receiver. A
simple fix at home (thanks to Probe) is to use layers of Teflon tape to tighten
the plastic peg-receiver joint. Not
only will the Teflon tape tighten the joint, it will prevent the plastic parts
from wearing out. After I get done with
most of my kit backlog, I am going to tear the left arm apart and Teflon the
link joints. After the 2 top arm sections, there is a short PV jointed section
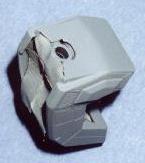
which connects the extending parts to the forearm. The forearm is where the dragon heads are mounted. From the top and sides, these appear
fine. Unfortunately, when the dragon
head is stowed and folded along the forearm, the empty, undetailed head
underside is in plain view.
The Empty Head! Note sink holes, obvious snap-together joints
I fixed this using Milliput putty (it is WAY
too deep to use a plastic solvent putty).
I filled in the dragon nose first, using my wetted finger to round out
the upper jaw shape. The area beside
and behind the lower jaw was filled flush to match the TV appearance. A side benefit is you can use the putty to
completely hide the lower jaw hinge PV.
The Full Head: assembled, filled and primed
Once the
arm is completed, and assuming it isn't floppy, it looks pretty cool. The shoulder guards hide the extension
sections well, so the arms look normal folded up. Full extension if you rotate the shoulder guard is around
5", which for this scale is impressive. Filling in the dragon head and the
floppy plastic link are big detractors, but relatively easy to fix.
Legs:
The feet buildup cleanly, with major subassemblies divided along color
break lines. This is especially
important if you want to paint the kit, since red and white simply are a pain
to work with on the same part. The fit
of the parts is tight enough to require paint removal for assembly, and no
putty. The only tricky parts here are
the heels and soles. If you do glue,
putty & paint, the red heel halves need to be assembled trapping the white
foot body in between. I painted the
foot white first, glued & puttied the heels, then masked and painted the
heel. With luck and good masking,
Altron should be stepping out in those fashionably red heels in high
style. The foot soles have a poor
mating surface, which results in a fair amount of work to make decent. This is typical of the 1/100 GW kits I have
seen-- the mating surfaces on the foot soles are slightly concave, leaving a
nice canyon right down the middle. The
good news is nobody sees the soles, so let your anal-retentiveness be your
guide. The calves are straightforward; the 2 halves trap the ankle and lower
knee PV caps. My sample only required
putty to cover sprue scars. When the
foot is popped into the calf, the ball & socket joint is clearly visible
from head on. I know this isn't a MG
kit, but Bandai really didn't try too hard here at all. A little sheet styrene could be used to mask
off the socket without killing flexibility.
The kneecap "claw" things fit on cleanly. I suggest leaving them off until after
painting, since getting in between the claws with a spray can or airbrush is
not terribly practical. Of course you
were just kidding about BRUSH painting, weren't you? The knee blocks and upper
legs are practically identical to the other GW 1/100 kits. The knee blocks cover the PV caps nicely,
and have decent flexibility. The knees
can bend up to ~75°, but due to Altron's incredibly top-heavy design, don't
expect to use much of it. Even without extending the dragon arms, this guy is
not capable of too many poses that won't cause a face/butt plant. The hip armor is also typical; independent
front skirts on ball sockets, independent hinged side plates and a fixed rear
plate. The fixed rear plate is not a
real problem, as it is angled out enough for most upper leg poses. My sample has somewhat floppy knee joints
(upper and lower), which compounds the posing problem. Teflon tape here is a must.
Twin Beam
Cannon: More
fricken' weapons?! Head gattling
cannons, beam trident, crushing dragon heads that belch Leo-melting fire, and
Wufei needs a near buster cannon?
Sounds good to me! But not the
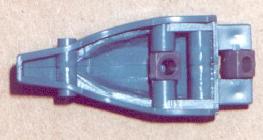
way Bandai did it. The twin beam
stinger is made up of 3 segments mounted to a pivot box. This allows the stinger to either fold back
on itself when stowed or to pop up over Altron's head. Unfortunately, all the PV joints are fully
exposed--it looks like crap.
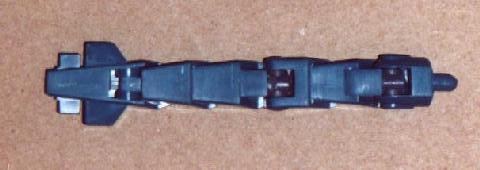
Crappy PV joints
This is
fixable by using sheet styrene to box in the PV caps. Of all the mods I did to the kit, this was the biggest pain,
since the PV boxes have to be built with the stinger totally assembled. Not a heck of a lot of room to work with,
but the finished results below justify it.
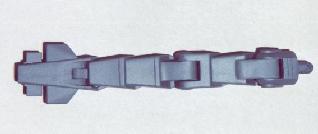
Finished stinger: PV joints covered, primed and ready to paint
Weapons: Altron is probably the most lethal GW mech at all ranges, having a
serious weapon to bear at long, medium or short range. All of the cannons benefit from drilling out
the barrels; the trickiest to do are the twin beam cannons, which can shred at
the split tip if not drilled carefully.
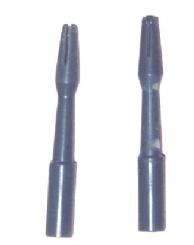
Twin Beam cannons. Left is drilled out.
Altron's signature hand weapon is the double
bladed beam trident. Bandai's
implementation, a la J.E.D., is the "Beam Spork". The grotesquely
mal-formed plastic wad only resembles its animated counterpart in one way: it
has three points. the basic shape of
the trident is wrong in the width of the blades, the angles of the blades and
the proportions of the blades. Other
than that, the are dead on. After some major surgery to trim down all the
blades, lengthen the center prong and re-shape the side prongs, it looks OK.
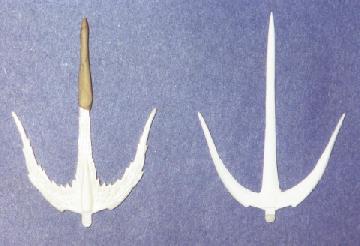
The unmodified and reshaped “Spork”
Another
Altron oddity is that the beam parts of the weapon (and the eyes) are made of
solid plastic, not the normal clear green found in other GW kits. This is easy enough to fix with a nice
metallic green paint.
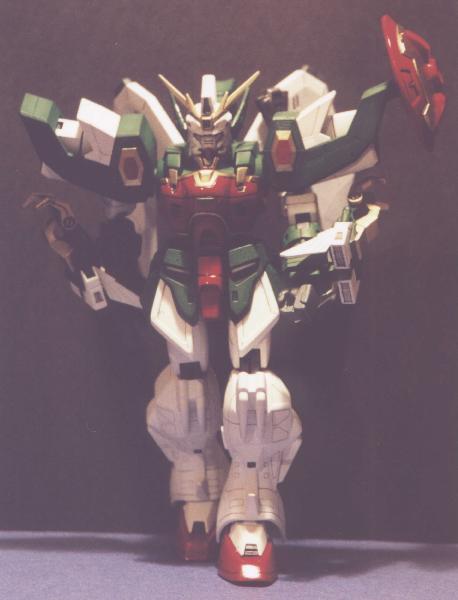
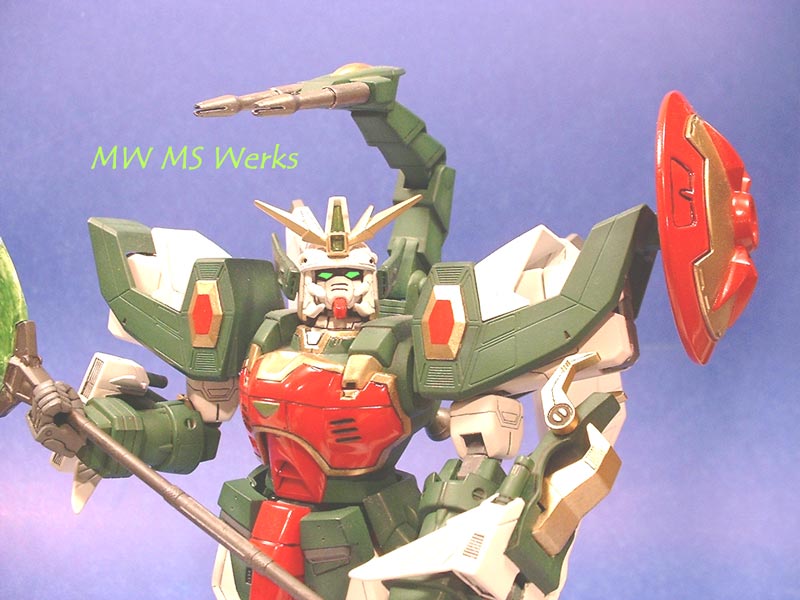
Miscellaneous: The head of the kit is one of the real strong points. It captures the menace of Altron, is well
detailed, and paints up great. The big wing binders are OK, and act as
counterbalances when the arms are out.
For the
money, this is a good kit. For some
reason, this kit is more expensive than the standard 1/100 GW kit. The main gimmick, the dragon arms, are
poorly executed out of the box, but can be fixed up with some work. If you are looking for a great kit out of
box, this ain't it. If you want
something that builds up with some work into a really nice kit, you are a Wufei
fanatic or you are in need of somebody to put your TallGeese II against, this
is definitely worth getting.
Ratings (for unmodified kit):
Value:
7
Ease of build: 9
Execution of overall design: 9
Detail:
HG
Gimmick execution: 5
Weapons:
3
My Altron
Gallery (I‘m a modeler, not a photographer!):
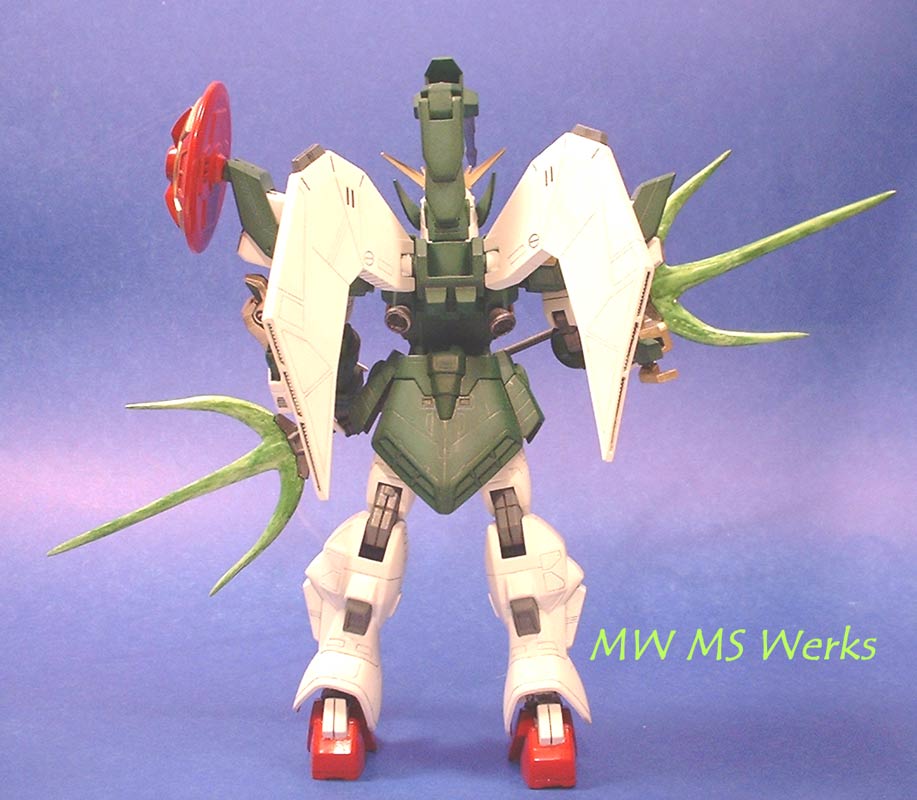
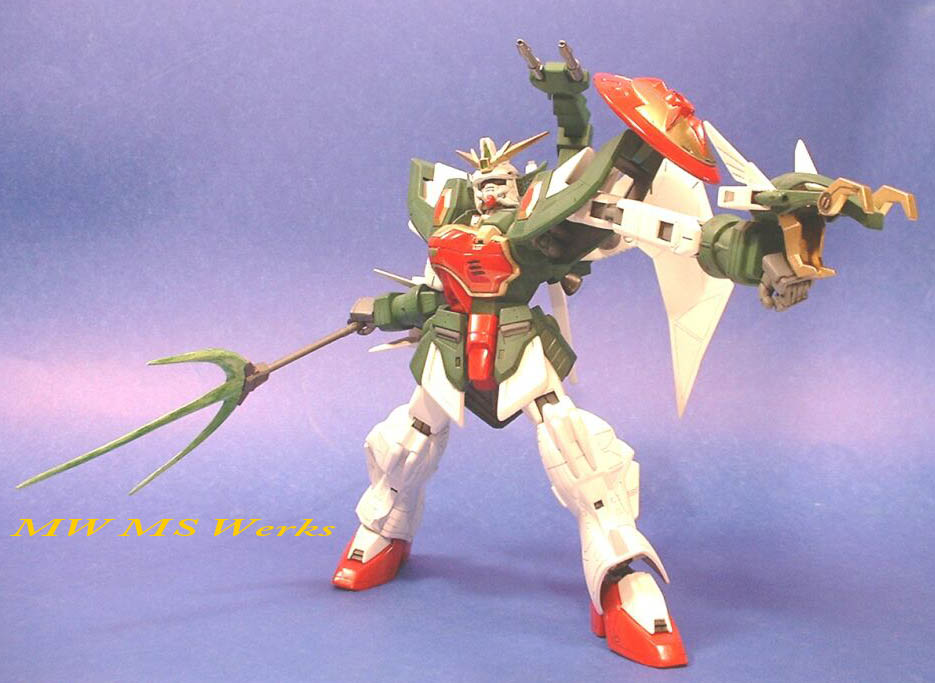
Altron
w/Trident Death
from the Dark Looking
up Rear Fangs
Out Double
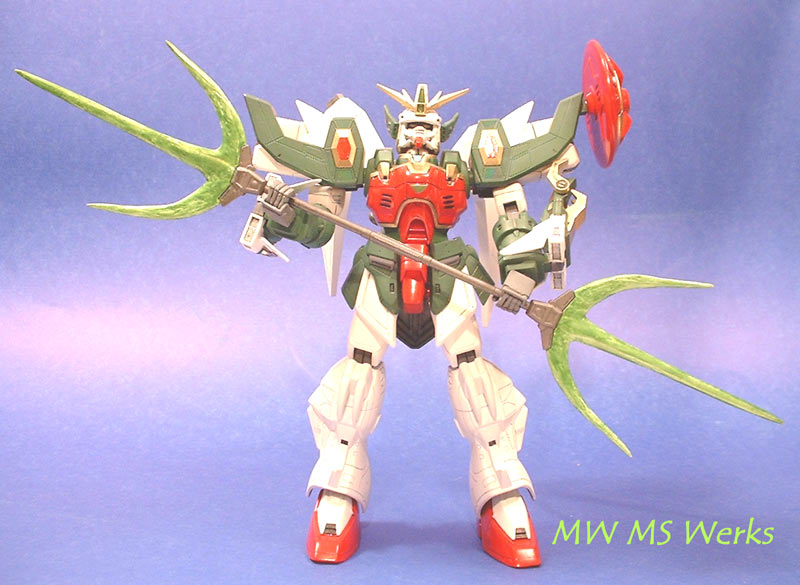
Fang Strike Altron
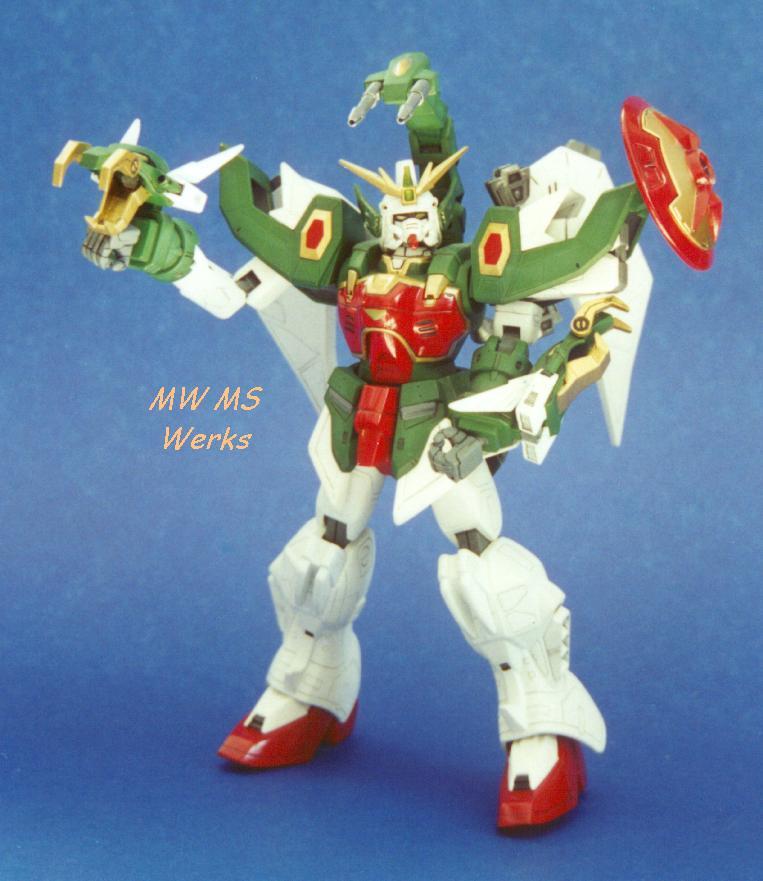
w/Trident 2 Dragon
Strike Altron Fangs Double
Fang Out 2