1/100 MG
Sazabi v1.0
This is a rather old kit released in July 0f 2000, and oft reviewed—so old, it has taken over a decade for the v2.0 or “Ka” Saz MG to come out. One of the more interesting reviews, in its 8 printed page glory, was that of James E. Doyle on the Sazabi back in Sep 2000 on the now defunct rec.arts.anime.models newsgroup (replaced by the likes of web forums like FichtenFoo, Hobbyfanatics, Child of Mecha, or Gamera’s Forum) Probably the most thorough build review of the most expensive MG to that date, it can be found here, and highlights the pros, cons and gross frustrations of building the kit. In short, it is a lament on how close Bandai came to getting it right (the sculpt is pretty OK), but also of how much they missed the mark in wholly fixable ways (uncovered polycaps in places, shallow molded details, etc.). While this kit is the first MG I completed, I have worked on several, and I agree with J.E.D.’s assessment overall. In a lot of ways, this kit is a half step between a true MG and a decent HG kit (not HGUC—most HGUCs I’ve seen are better relatively speaking—the recently released HGUC Sazabi being a shining example). J.E.D. ended his continually souring relationship with this kit in March of 2007, and I am now the owner of the very kit immortalized in the War and Peace sized review.
When I started this project I envisioned it taking 3 weeks--the
amount of time my wife and infant were going to be in Japan. It actually
took me slightly over a year before I declared victory and moved on.
While I have documented portions of this build on several online hobby forums,
the more interesting things (to me) done with this kit aren't coherently
captured. So, this page is intended to lay out the modifications, and
some of the techniques I used in a way that is less scattered than my build
process.
Quick postscript to this build. During the 2010
Bandai World Cup Competition, this model won the semifinals held at Otakon. It went on to be a second or third runner up
for the overall North American entry for the finals in Hong Kong. Not too shabby, IMO!
As mentioned, the overall sculpt is OK to my eye, especially since I’m shooting for anime accurate, not line art perfect. I disassembled the kit into constituent parts, sometimes a few times, to build in mods or fix things. Without further delay here are my well intentioned list of mods:
Major mods:
1. Fix the ankles/legs/hip joints for posing
2. Make the shoulder armor more "curvy"
3. Adjust the chest sculpt a bit
4. Make it so the big guy can hold his gun up and down for once
5. Monoeye
lighting
6. BIG one, importance wise--make detailed blanks to cover up the
interior of the shoulder armor where there is nothing but an UGLY seam
7. Replace any surviving actuator cylinders with metal
Potential/minor mods:
1. Replace the arm actuator cylinders, and add anime accurate conductive cable
housings (yellow, like the waist belt)
2. Make the hands with bead knuckles, like in HJ
3. Make a better shoulder joint
4. Add head camera/sensor thing, making chest vents, swapping out a few verniers
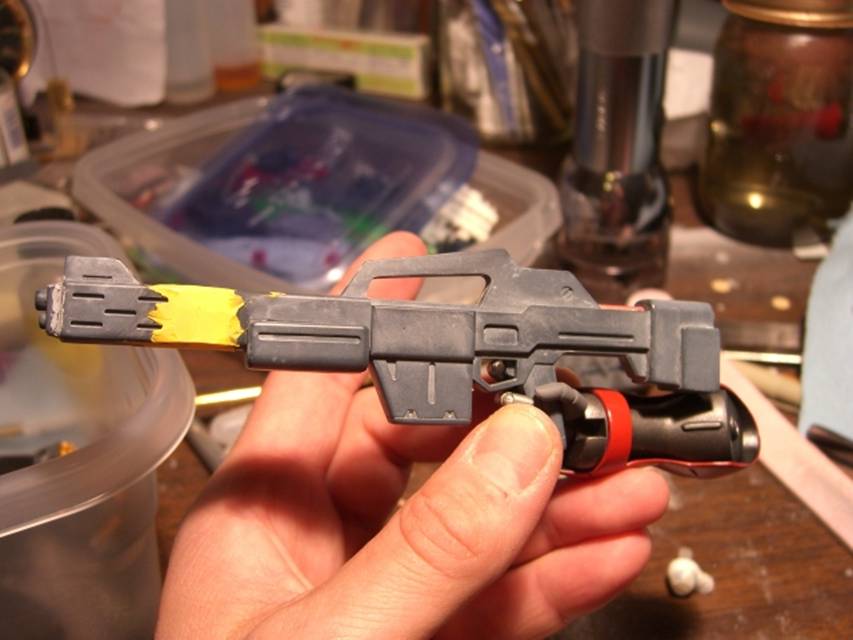
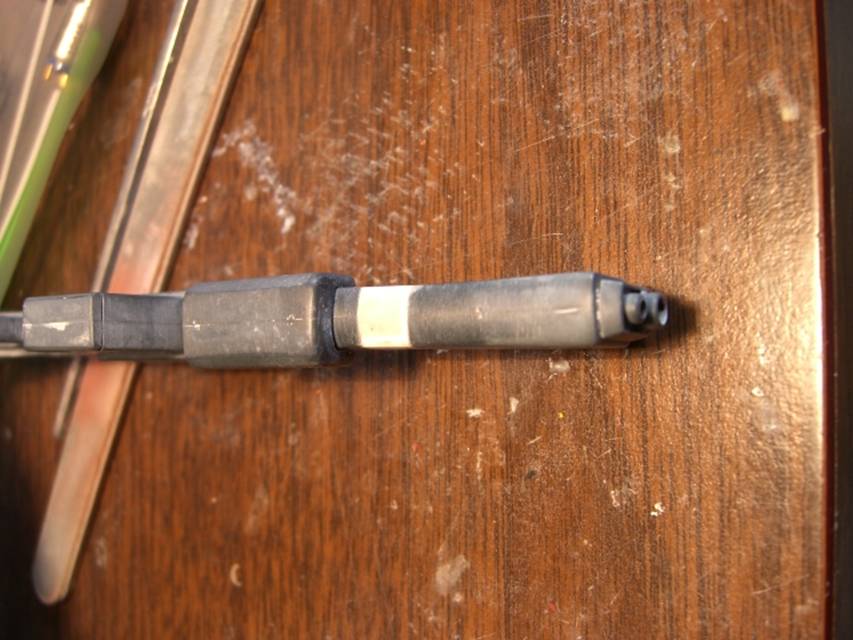
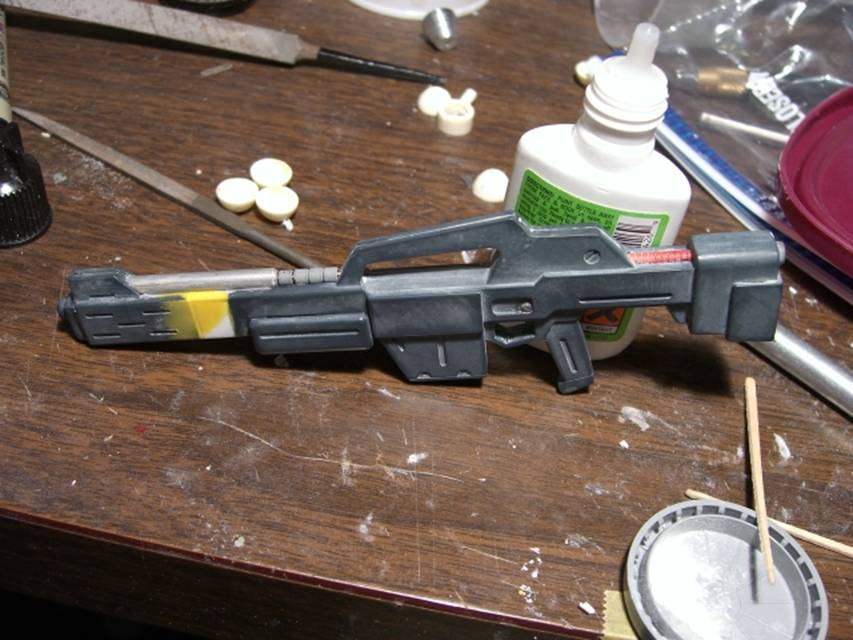
5. Detail the beam rifle and extend the barrel a bit
First a note about sources. The CCA OAV was my primary source, as my goal from day 1 was an "anime accurate" Sazabi. I also wanted a visually interesting model, without going into the realm of Evo nonsense. The anime was helpful for colors and outer mold line (overall shape), but not so much for any details that weren't explicitly shown. For example, the details from the shoulder to hand were entirely derived from CCA, as was the new beam tomahawk. My inspiration for added, unseen detail, such as the shield interior or the funnel launcher inside, was the Hobby Japan CCA Weapons book (or Mook if you like), and other builds in HJ or on the web. I can't say I copied any particular layout, but seeing the builds did help me determine what I thought life like detail would look like in 1/100 scale.
Here’s an overview of the completed mods:
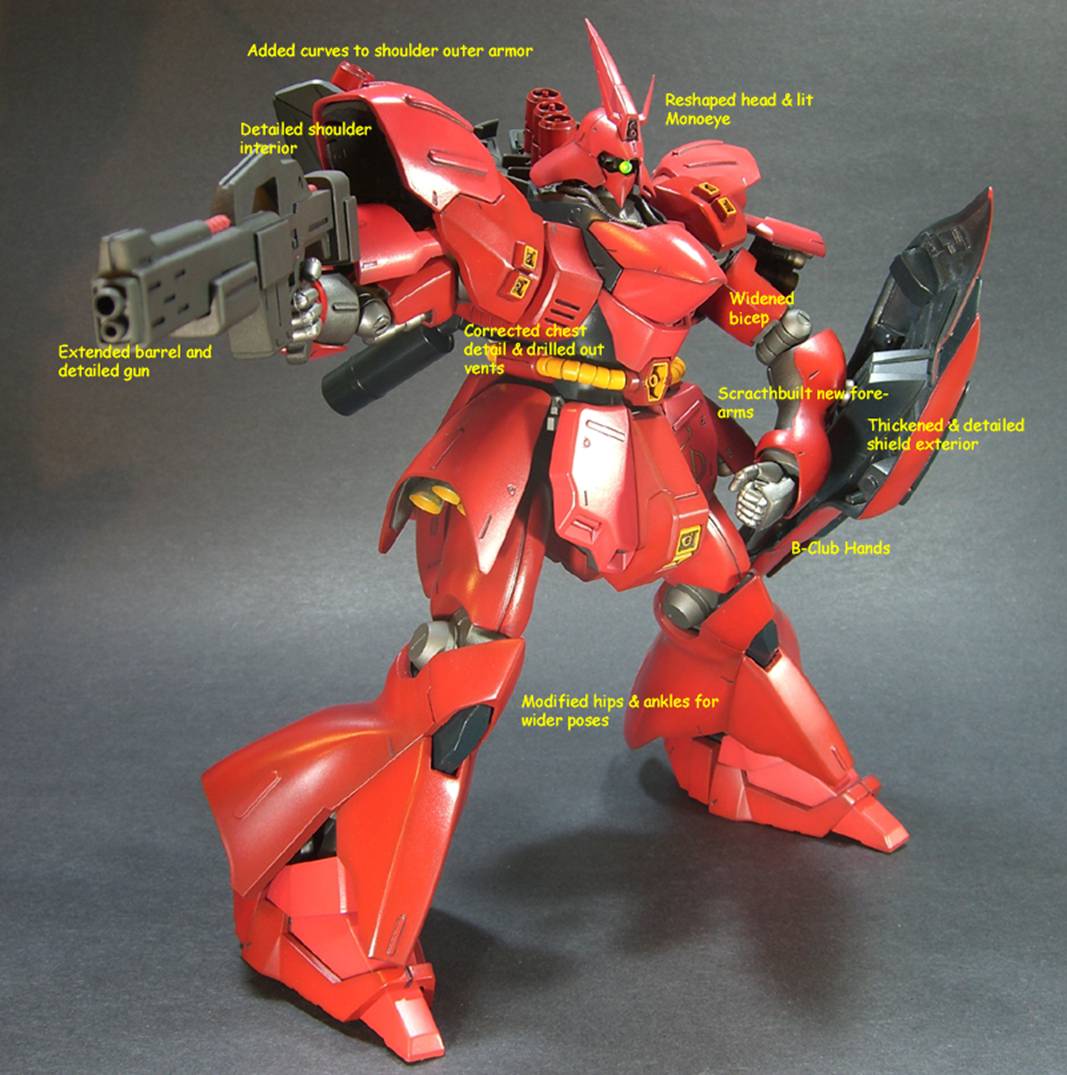
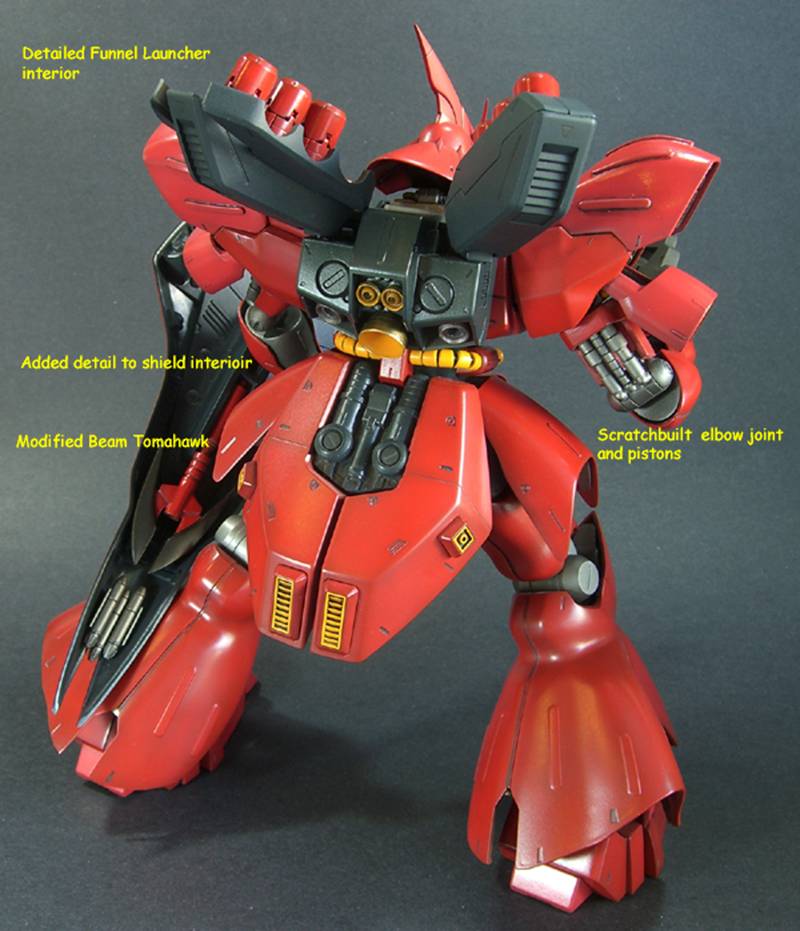
The mods are organized by body parts: head, funnel launcher, torso, arms, shield, hips and finally ankles. Simple mods, like replacing thruster nozzles with resin or metal parts, may or may not be noted.
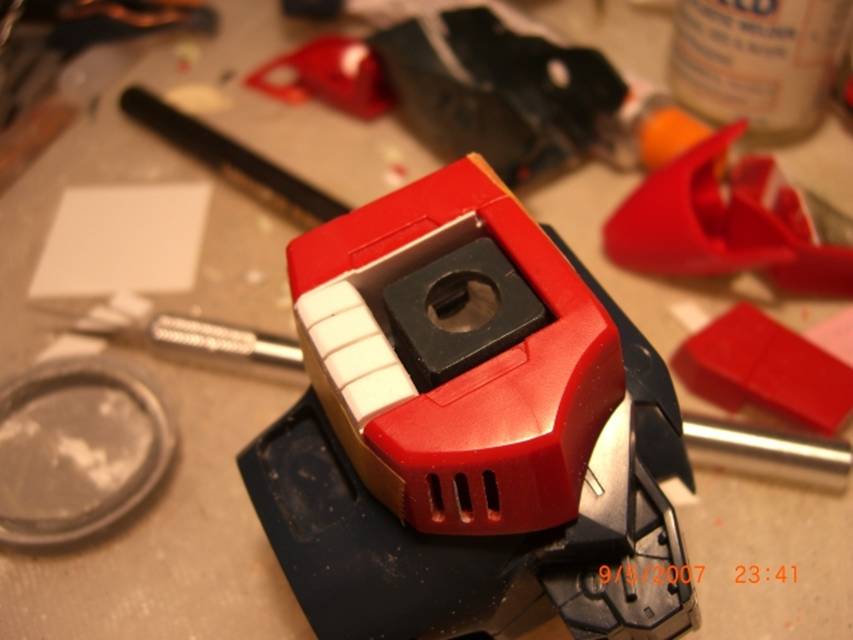
Head
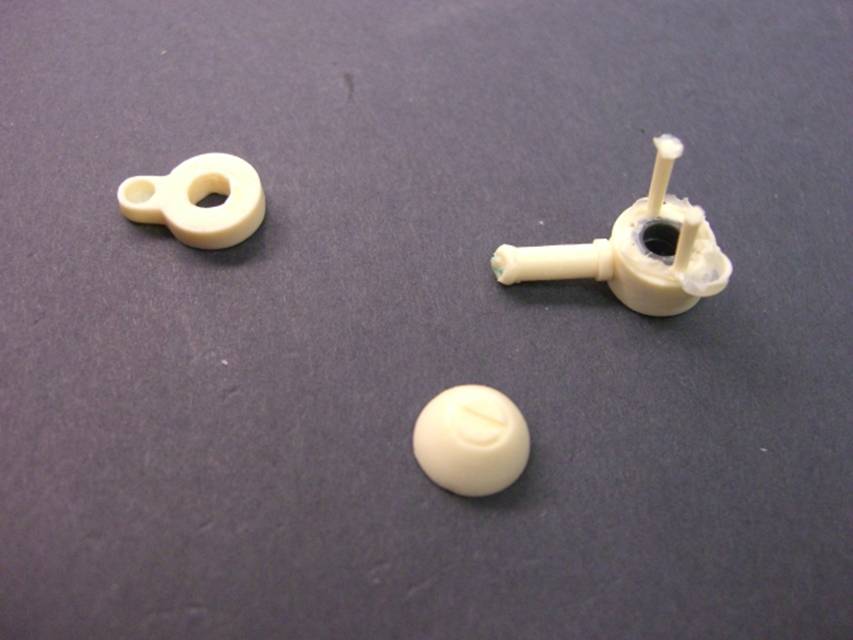
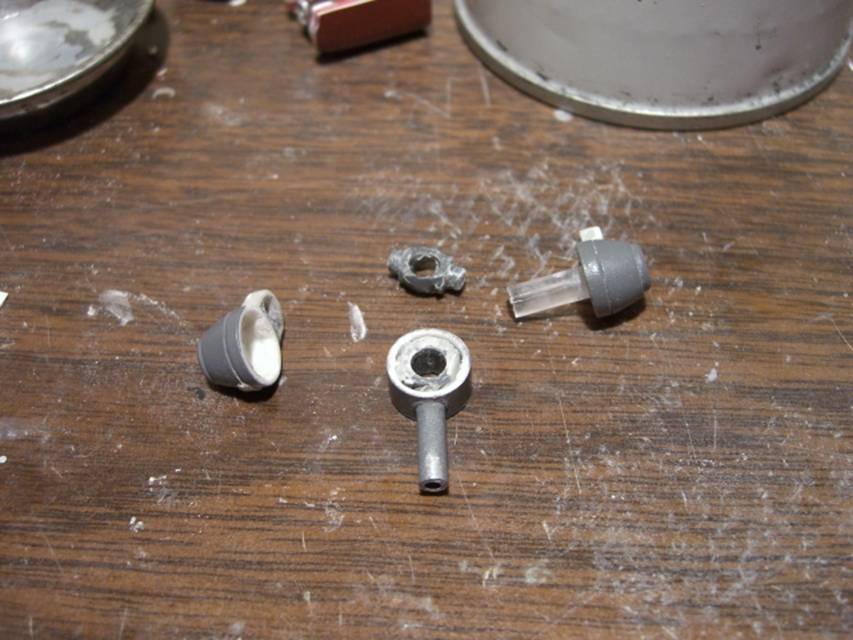
This was a relatively straightforward mod, replacing the pivoting kit monoeye with a green LED. The head is a standard single mooneye, which moves in only one plane—only one axis to deal with. I removed the kit mooneye and did some major excavating of the cockpit around Wee Char’s leg stumps (recall Wee Char has no legs). The LED leads were bent at the right distance so it would pivot like the kit part, then soldered to wires. After insulating the LED/wires together, I used a drink stirrer straw to enclose (with SGT) the wire bundle. I used another section of straw, split down the side to fit over the LED straw, and more SGT to make the pivot for the LED.

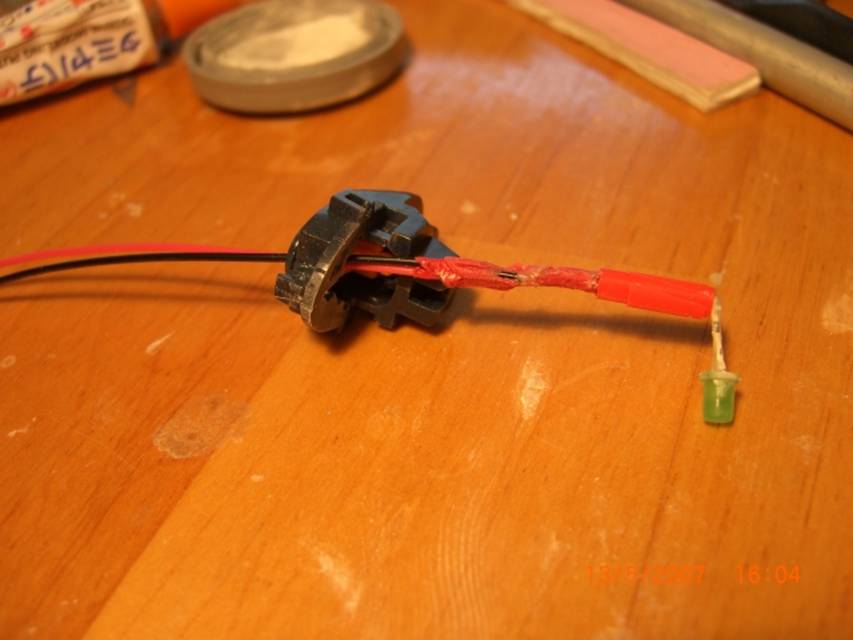
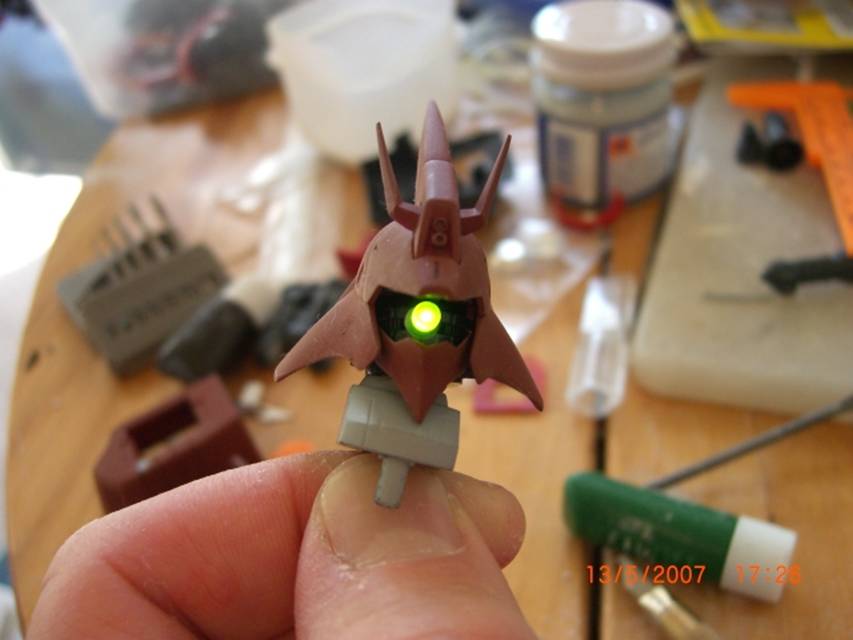
The LED lens was marginally reshaped to look more detailed. As for power, a single 3V coin cell fits into a hole in the torso, with a future option to run wires down a leg to an external adapter. Finally, the helmet rim was sharpened, per Electric Indigo's advice.
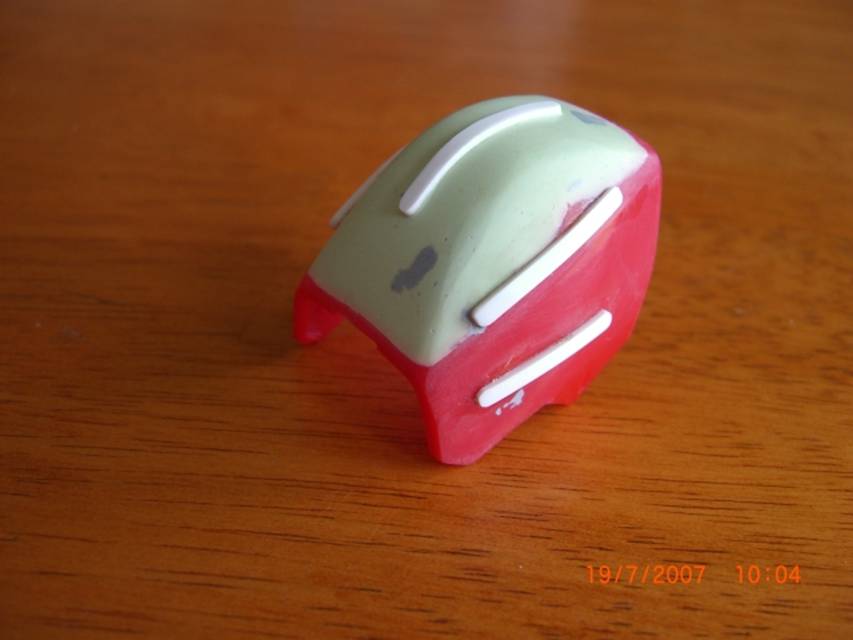
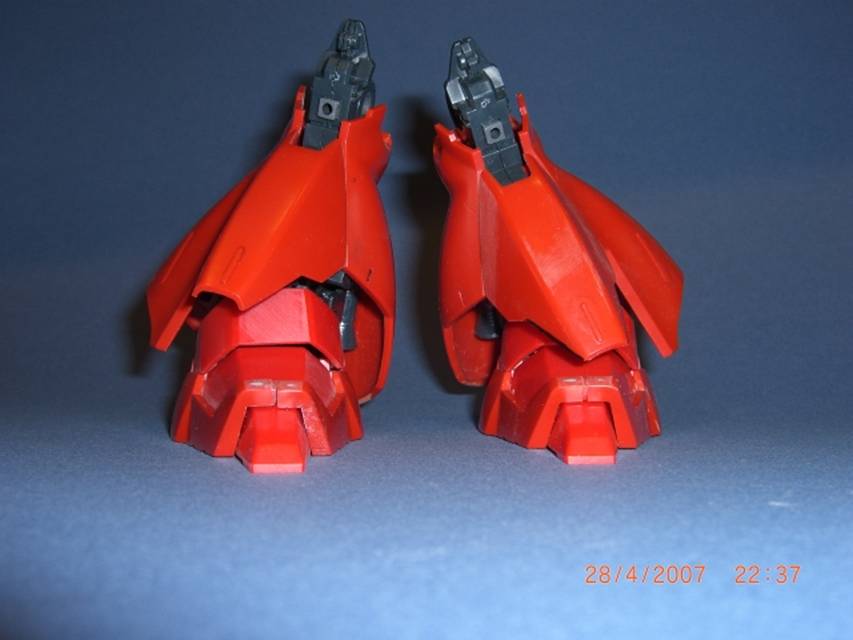
Funnel Launcher
I decided only one would be open--in the anime Char often
launched from one side when he wasn't taxed. The original interior was
bare plastic with ejector pin marks, so I first tried to create a framework
from strip styrene to dress it up. This looked far worse due to issues
with cleaning up glue marks, so I stripped it all out and started over.
First I removed the hinges (gluing them back on, no matter how well done, is
always dicey). Then I cut a thin sheet of styrene, 0.01", to line
the interior of the doors.
Once this was done, I redid the styrene framework details. This process ended up warping the doors slightly, which took some effort to bend back into shape so they will close. I also added some minus mold details to the launch deck, and toyed with adding a power cable shown in the lineart, but there simply wasn't room. The trickiest part about this mod was aligning and remounting the hinges to be stable, especially with the doors slightly warped and slightly thicker from the styrene sheet liner.
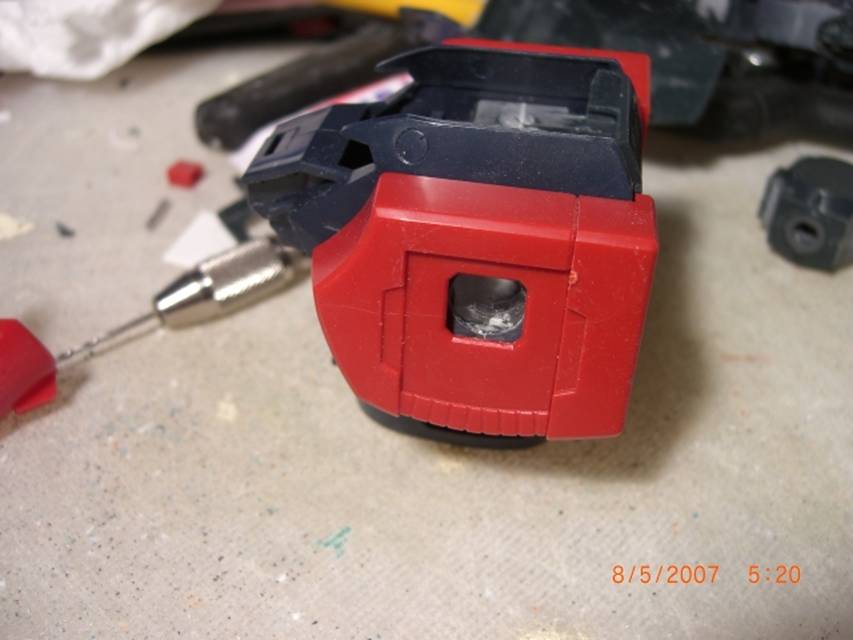
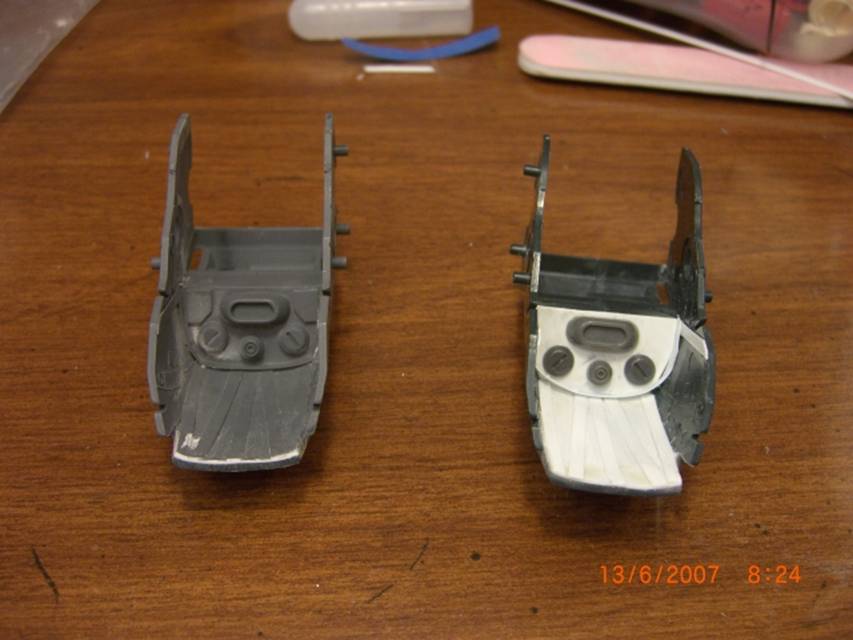
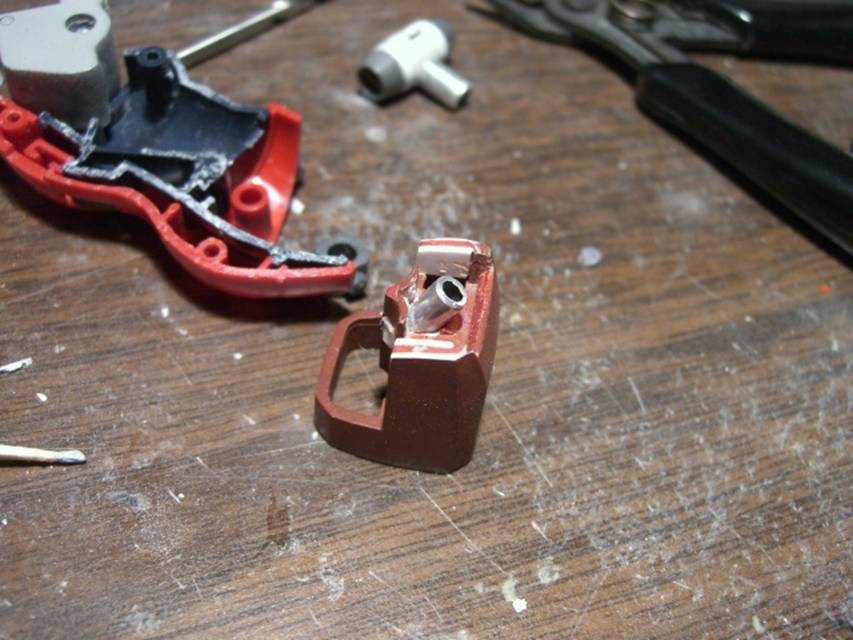
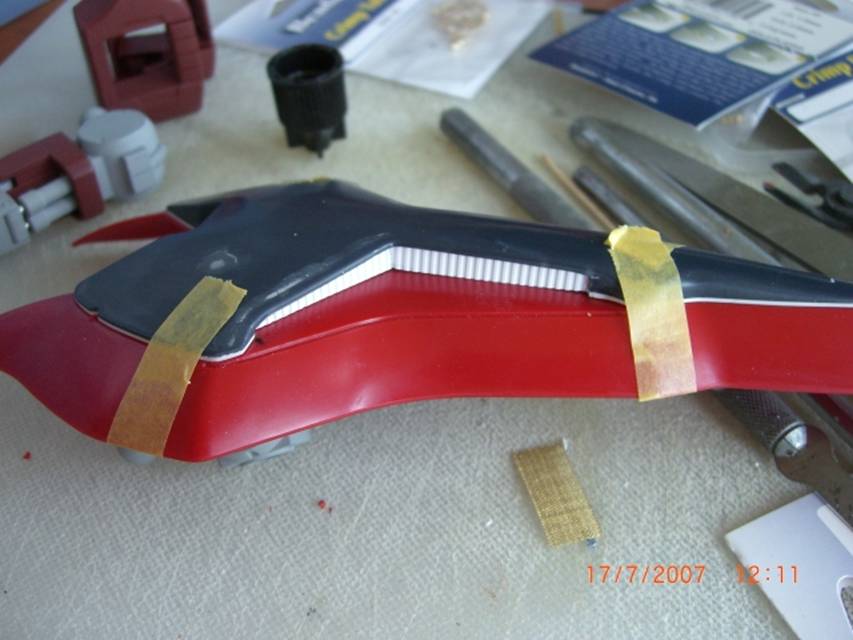
Torso
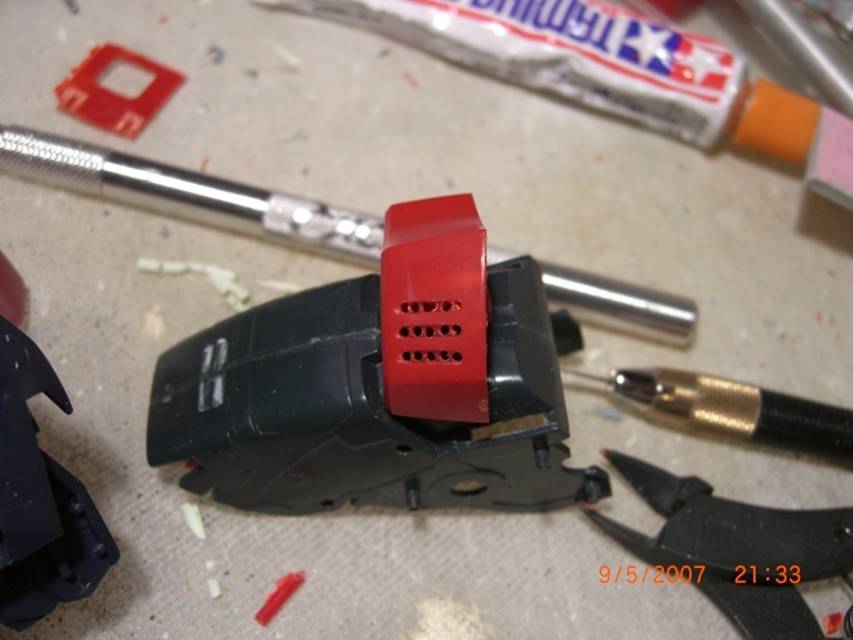
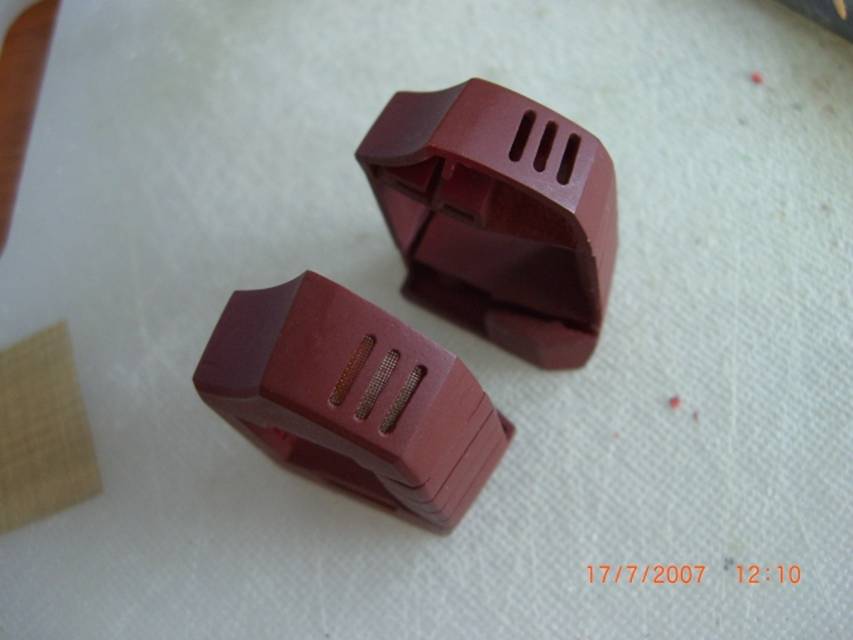
This took a while due to gross stupidity on my part. Having read numerous reviews on the kit, I saw the shoulder ball joints tended to be too weak for the mammoth shield, resulting in droopy arm. Since I was going to beef up the shield and make it heavier, I needed the strongest ball and socket joint possible. Yellow Submarine makes a line of acrylic joints, which are the absolute toughest, far stronger than PV. So strong, you might be afraid to articulate the joint. So, using a socket similar to the kit part, I dremeled out the chest block styrene and mounted the acrylic socket with SGT. Similarly I cut the ball end off the kit part and used SGT to mount an acrylic ball. Unfortunately, I had so encased the socket with rock solid SGT that I was unable to put the ball in--the socket had ZERO flex. I lost another couple days carefully excavating the socket from the SGT enough so I could force the ball end in. This Joint is now ridiculously tight, to the point I hold my breath when shifting poses. Needless to say, the shield arm does not droop. The side plates on the chest are probably the worst detailed attempts imagined for an MG kit—a blank wall of plastic with some fairly inaccurate shallow details around the edge. I cut out the blank wall and the bottom edge, replacing the bottom edge with scratchbuilt details. The blank area was walled off on the inside. Cutting out the blank exposed the chest/shoulder joint internals a bit, which gives a pretty nice look—at least something is there. The last bit done here was to drill/clean out the front chest vents, then back them with a mesh screen.
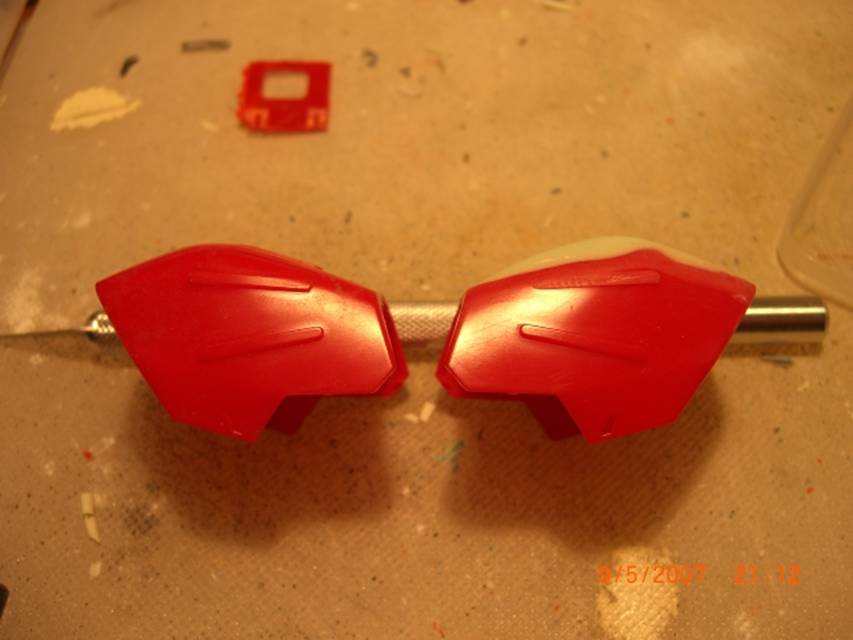
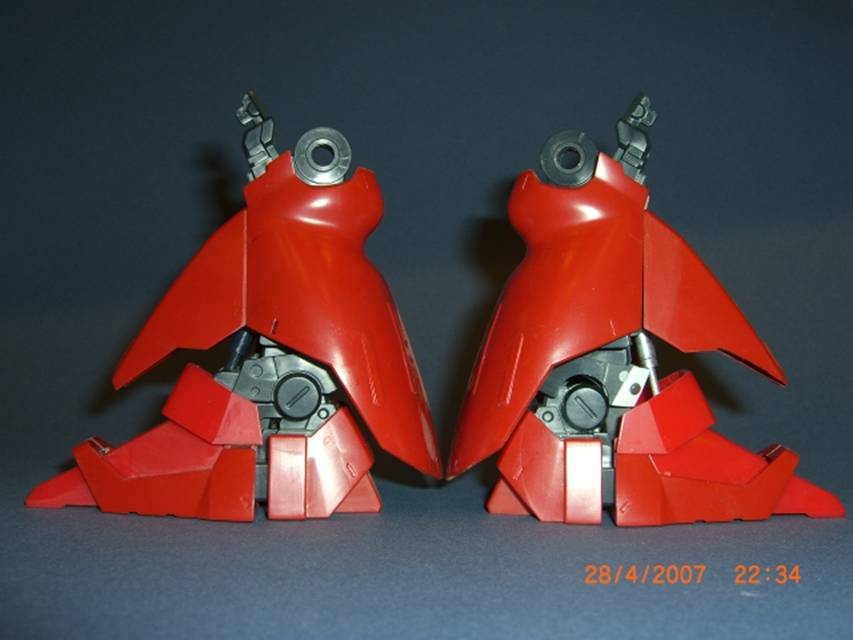
Arms/Shoulders
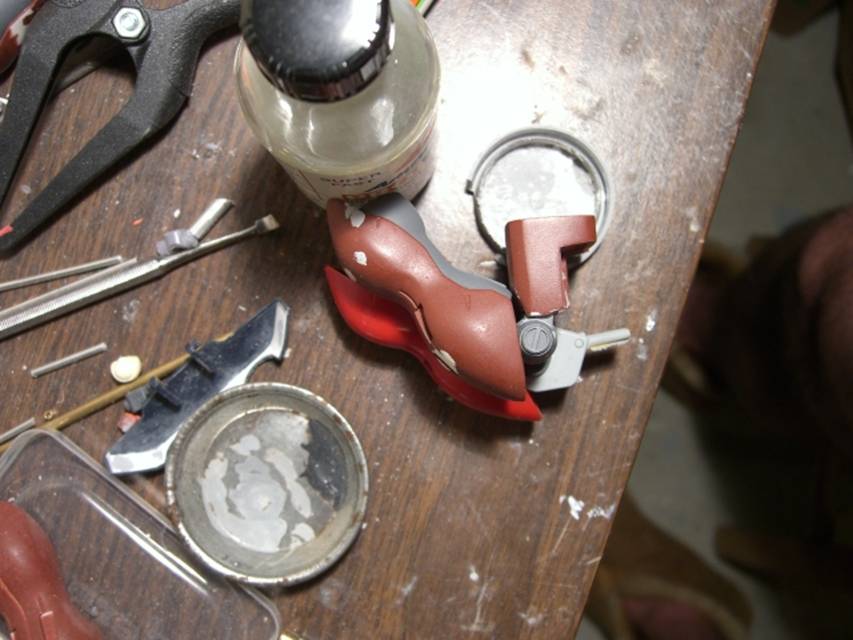
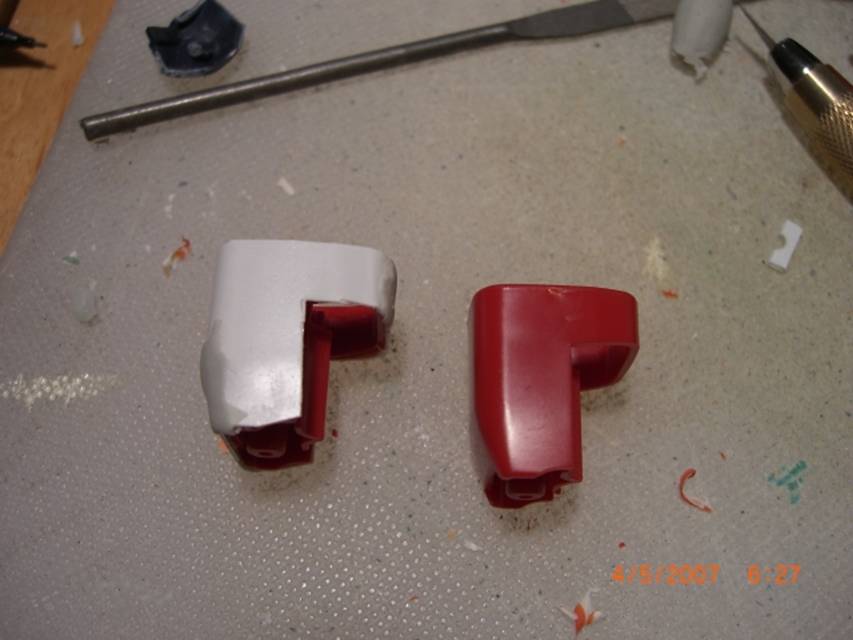
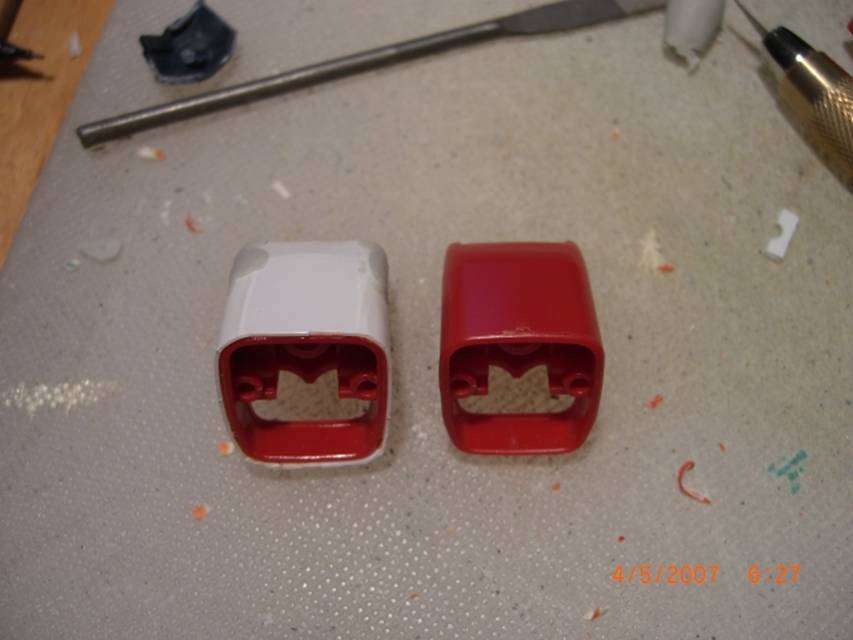
This is where I spent the majority of time on the kit. First was the shoulder end of the acrylic joint mod. There is little to do here for mobility’s sake. Aside from the ridiculous 2-handed beam saber windmilling attack Char pulls out on Amuro during the last bit of their fight (I assume there is a “windmill” button in the cockpit of all mobile suits in case the pilot forgets basic melee weapon combat skills), there is little more to ask of the joint aside from stiffness the acrylics provide. I also added 2 sets of power cables using bead thread and semi spherical crimp beads to the shoulder. These power cables are clearly seen during the anime, so I had to add them. The shoulder armor was also modded. First, I removed the snap connectors the held the inner frame and outer red armor together. If the red armor comes off, those snap connectors look goofy. Then I detailed the other blank interior of the shoulder armor, adding strip styrene framework and a few greeblies. On the other side, by the head, I added a few more greeblies to cover a seam line that is always visible when doing a close-up head photo. The outer red armor piece was too flat, so I curved it up using Tamiya and Mori Mori polyester putty. The raised strips on this part were removed and replaced, as the poly putty buried the originals. It took a fair amount of eyeballing to get both sides to match up, given the complexity of the curves.

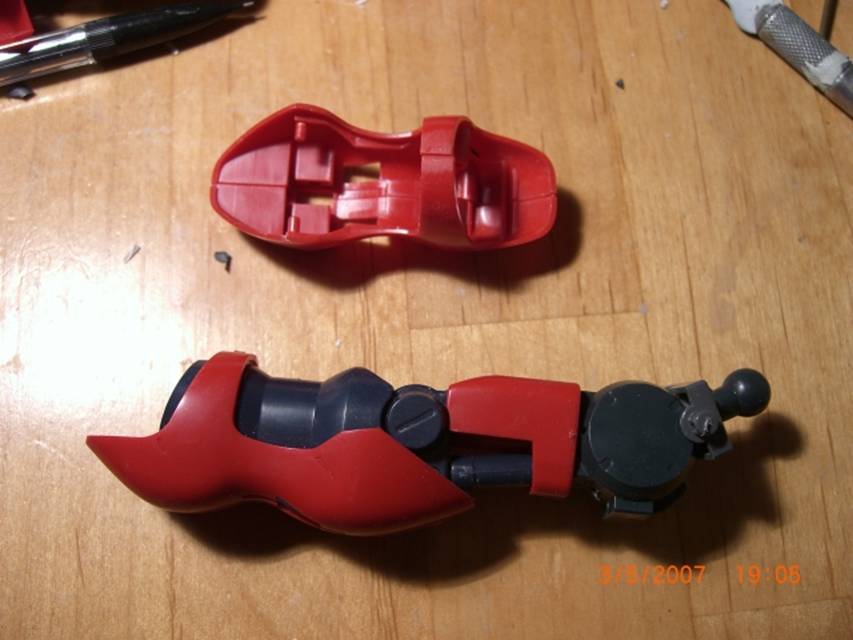
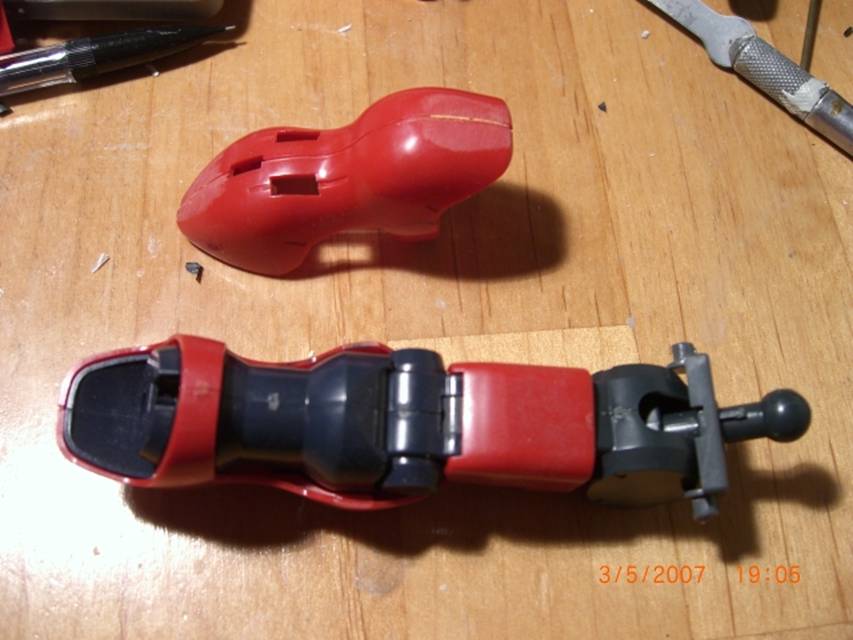
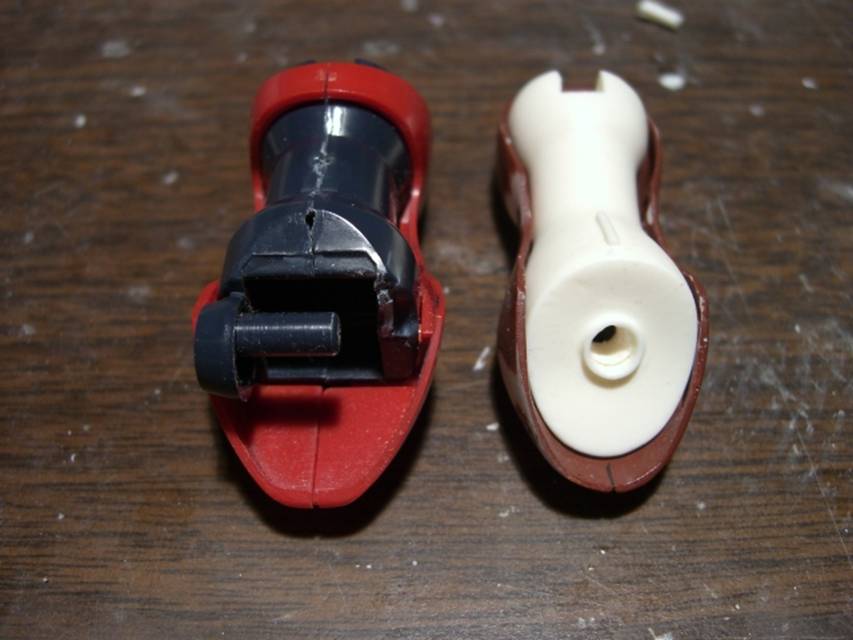
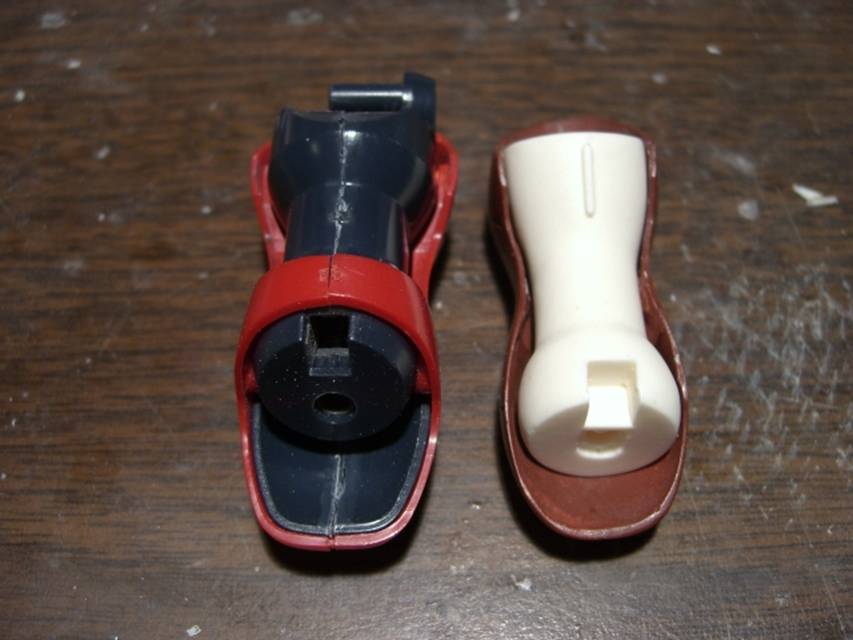
Forearm--Scratch build
I completely replaced the interior forearm pieces, which was pretty much tied with the shoulder joint as a time sink. In general, they are way oversized compared to the anime (think Popeye the Sailor). The Sazabi would never be able to hold the beam rifle with those things in the way. All in all, it gives the kit a mountain gorilla arm profile, which is just wrong. The basic plan was to slim down the forearm to match the anime better, give the wrist more of a built in curve, and move the wrist ball joint more to the center of the wrist disk. A side benefit was getting rid of the wrist beam saber polycap mount, which is awkward and exposed. By doing this, I figured there would be enough room for the beam rifle stock to fit inside of the forearm, instead of on top. The red armor pieces were cut down in length and reshaped to slim them down. The new internal forearm was built within the armor profile using scrap parts. After reworking the parts, the next step was to cast resin copies. I had 2 reasons for doing this. First, I didn’t have the time/energy/parts to scratchbuild two sets. Second, the parts I made the forearm out of were quite flimsy, and I needed something solid and strong for the arm. The RTV molds for the outer armor shell were based on the technique I perfected for the HyGogg, and were much simpler to execute.

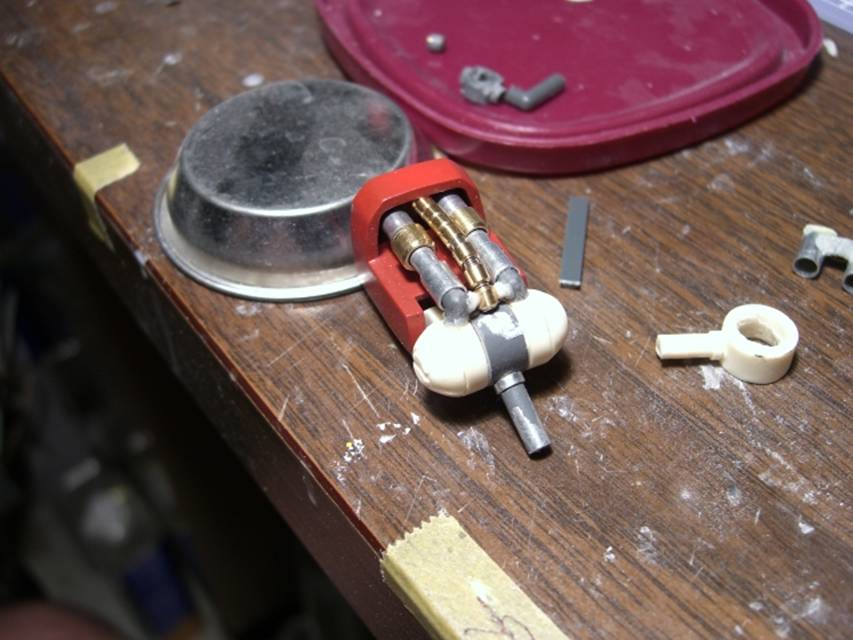
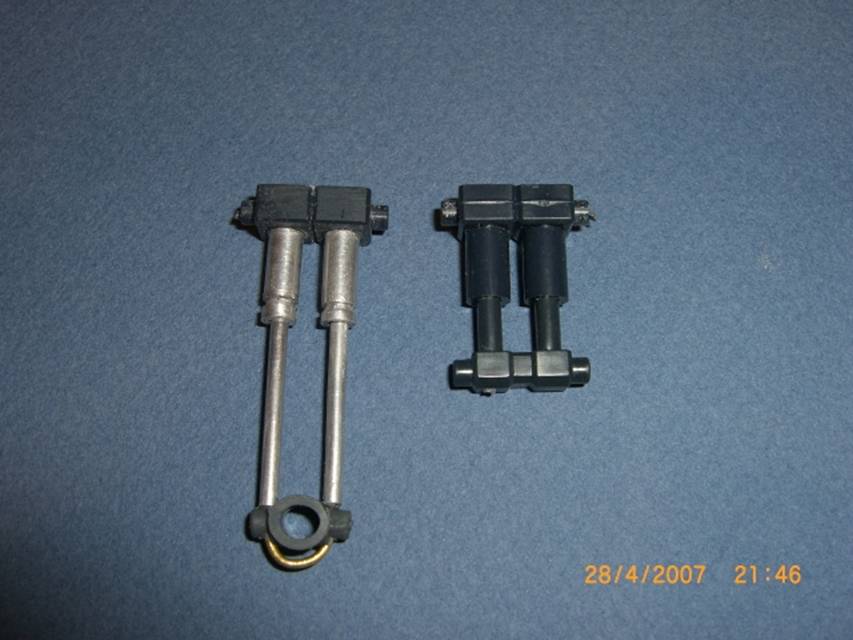
Elbow/Upper Arm
Narrowing the forearm also impacted the elbow joint on the upper arm. The upper arm has an odd double pivot elbow joint with more actuator cylinders. In addition to providing absolutely no useful function, they are poorly detailed plastic, and doesn’t look at all like the anime. After a few iterations, I settled on a single hinge that was as or more flexible than the original due to shape and smaller size. The elbow is made of 5 tube sections--2 outer caps, 2 inner rings holding PV and attach the elbow via PV to the bicep, and a final center ring with a rod mount for the forearm to slide (and rotate) on. In order to better match the arm proportions in the anime, I ended up thickening the biceps by wrapping the armor pieces in thin sheet styrene. Thin forearms + thick biceps = better match to anime proportions. As can be seen, I made a master, then cast copies out of resin trapping the PV material in the actual casting so it becomes an integral piece.
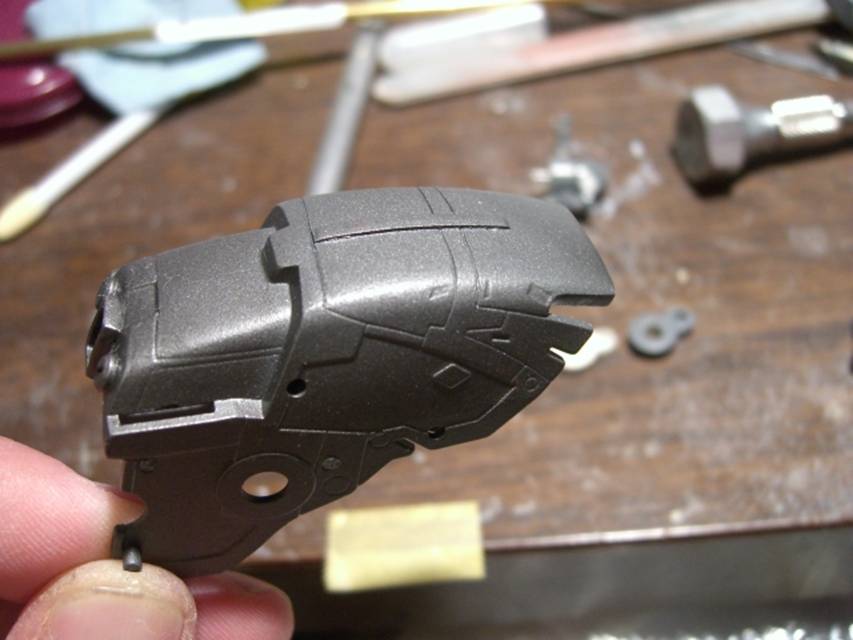
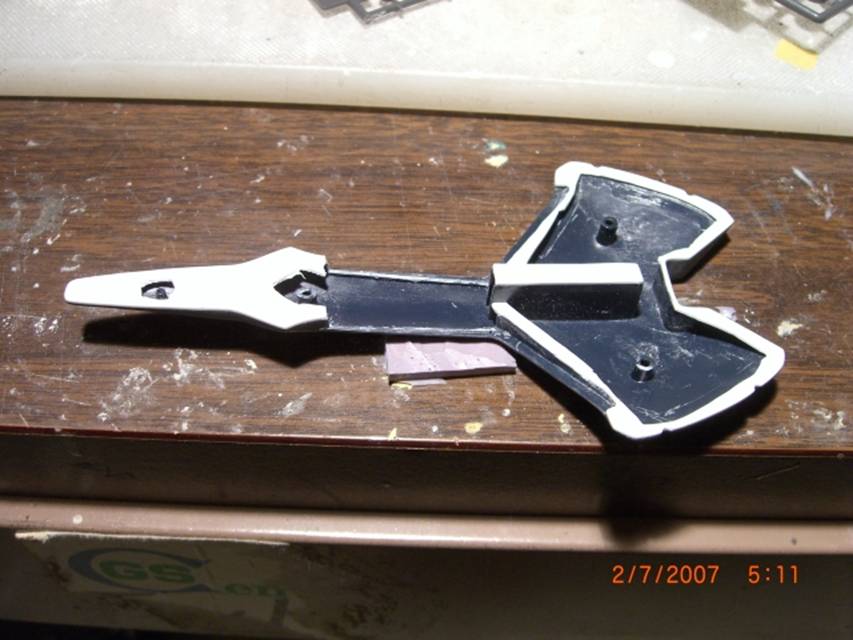
Shield
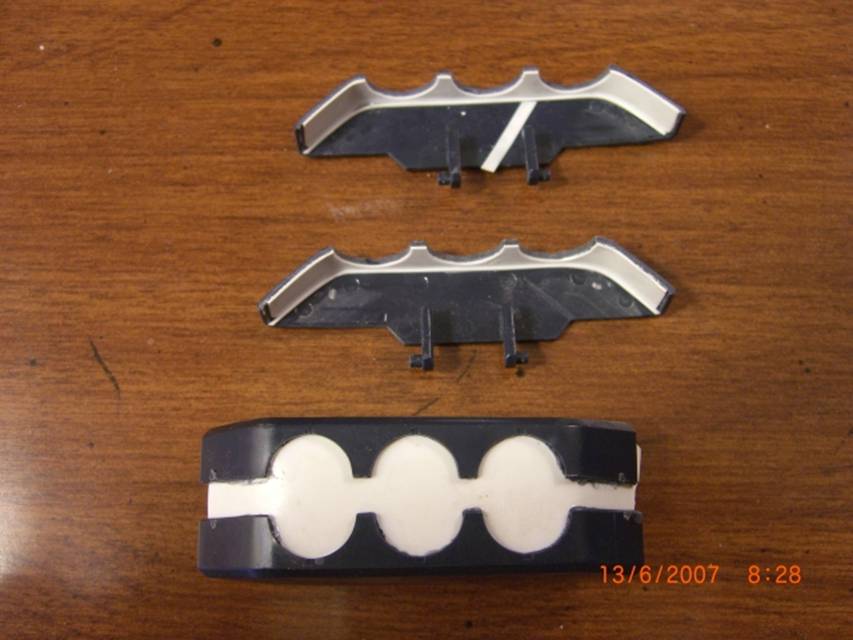
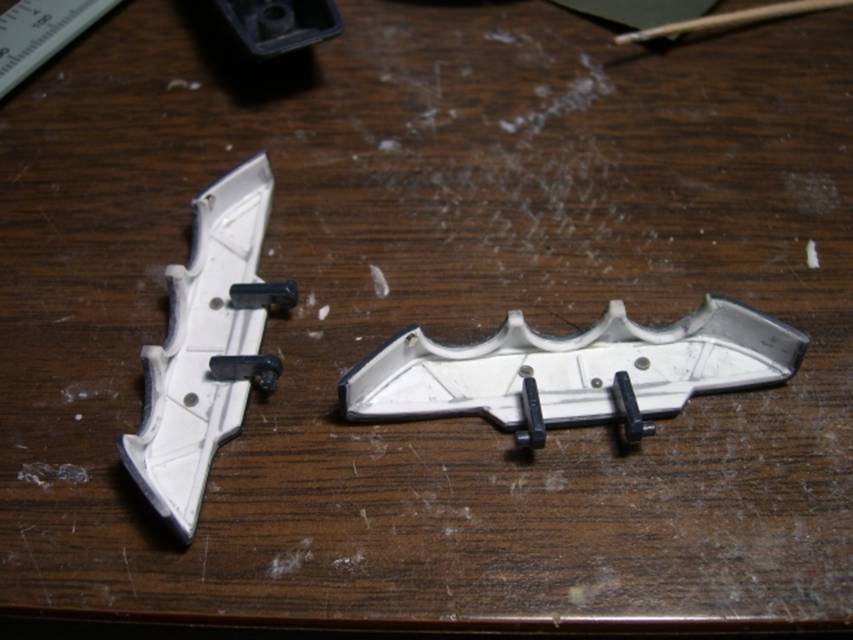
The kit shield is embarrassingly undetailed for such a huge mount of real estate. The outside is OK, but the inside is pathetic, with softly molded “ribs”, or indications of ribs. Weak.
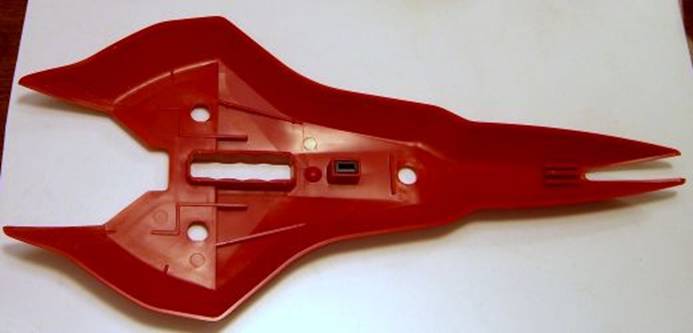
The first step was fixing the outer blue piece—making it
thicker, and adding details to some of the blank undercut areas. I
totally made this up.
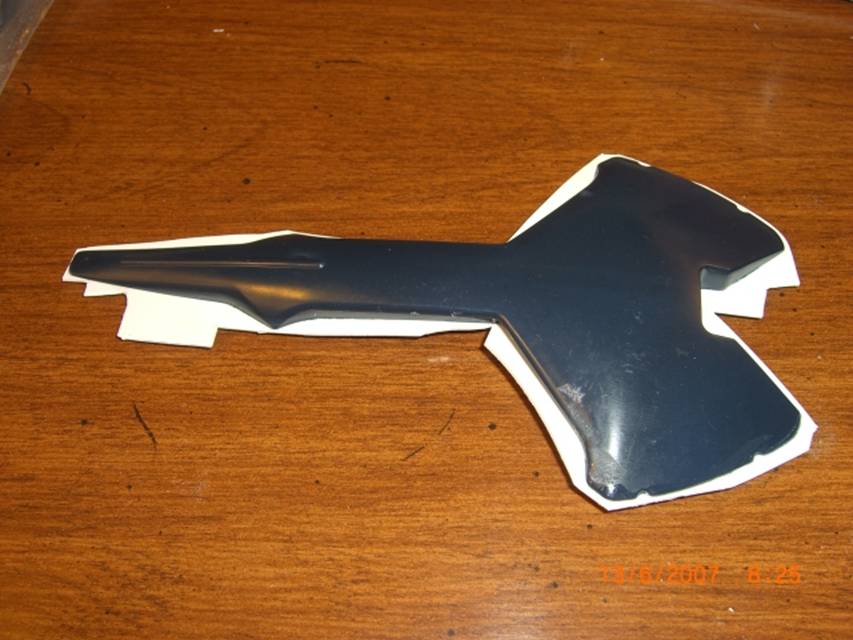
Next was building a believable framework of details inside the
shield. Like the funnel launchers, I was too ambitious the first time,
creating messes I couldn’t clean up. After stripping it all with mineral
spirits, the second try went more smoothly.
The two versions, final in primer, are shown below:
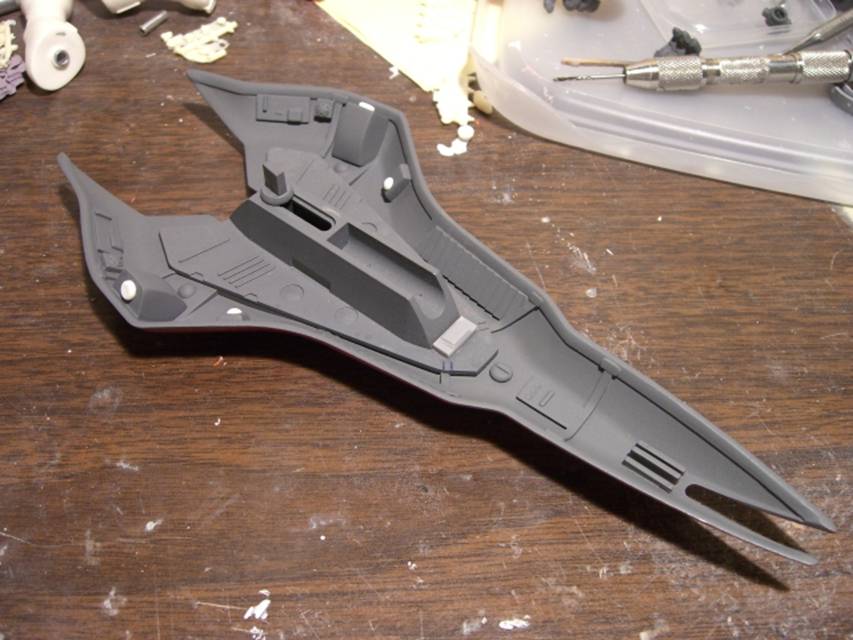
Note the slot the Heat Hawk plugs into is gone. The final version has a styrene covering over a super magnet (more below) to hold the heat hawk in place.
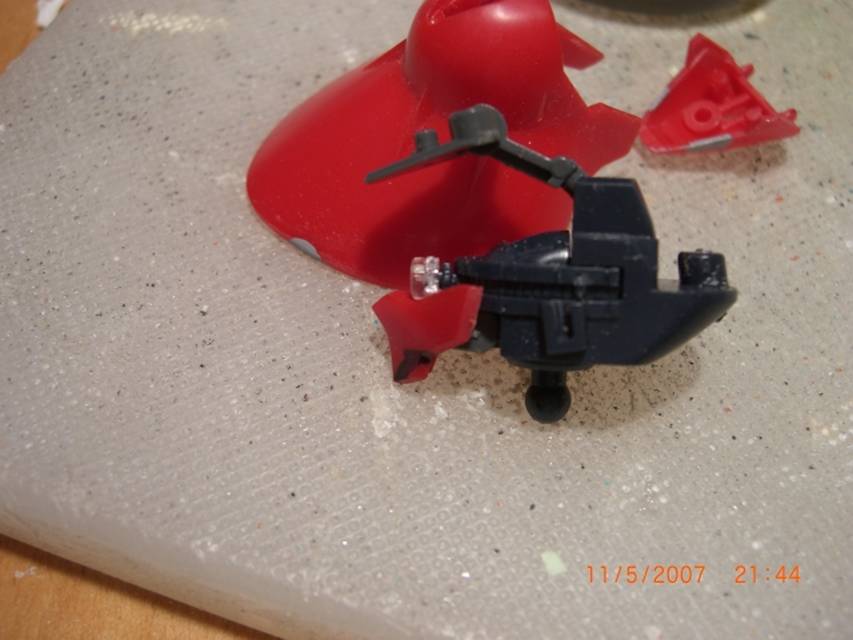
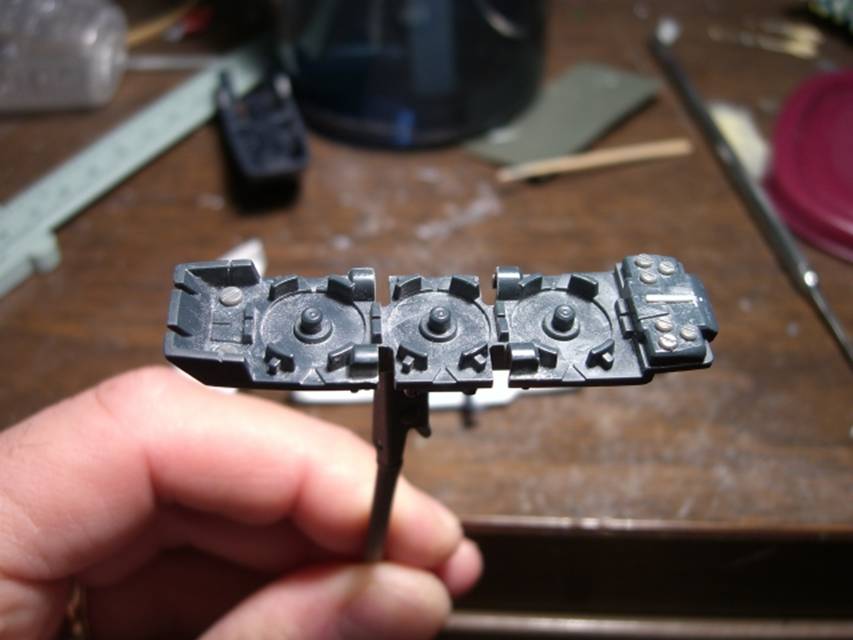
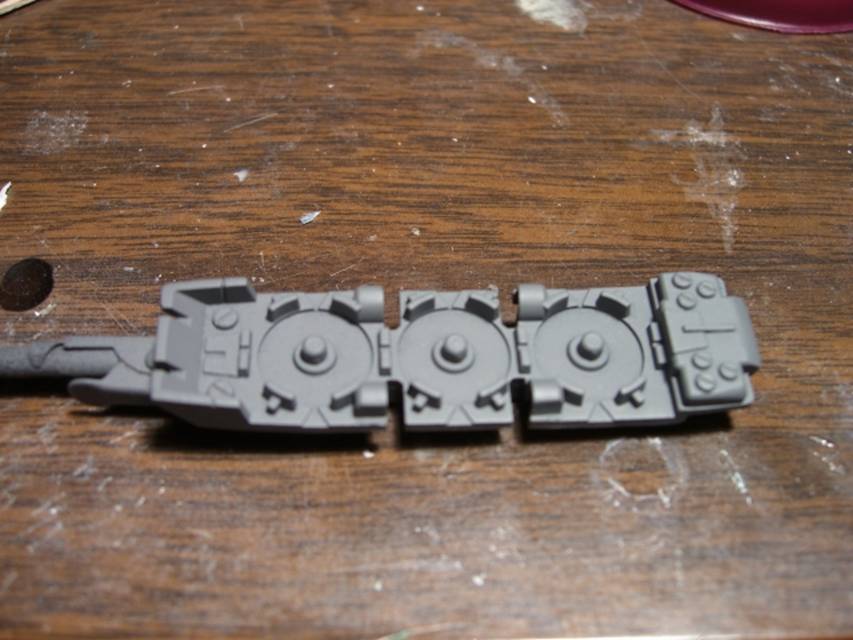
Ankle
The first mod I made to the Sazabi was the ankle joint. Though I intend to display the kit on a stand for the “in flight” look, the ankles are pretty limited and any decent standing pose (other than at attention) is hard to impossible to pull off. The biggest impediment is the lower most leg frame piece, where the bottoms of the actuator cylinders are housed. The fake ankle hinge is so wide it bangs into the foot. So, I either had to chop up the foot or the bottom piece. The bottom piece got the axe, mostly because the foot is OK looking, and as an engineer the bottom piece’s lack of sense offended me. I cut out the minus mold hinges and attached them where they made sense on the foot.
The rest of the bottom piece was butchered—the entire bottom part housing the actuator cylinders was cut off, along with the front face. The fronts were rebuilt with a gap to fit the new actuators, and overall the part was narrowed to hug the ankle peg part better.
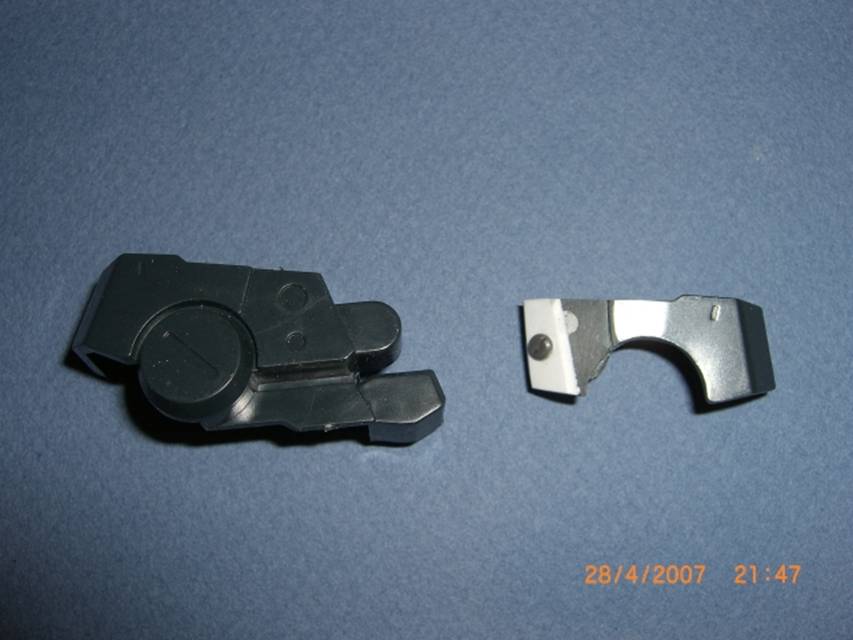
The upper housing and the actuator cylinders were replaced with metal tubing, and the actuators were lengthened considerably so they could mount off the ball peg piece by the ball joint.

I then shaved down the backside of the ball joint piece to swing around the now fixed minus mold pieces. The finished mod looks a lot better, and adds about 20° of side tilt to the ankle.

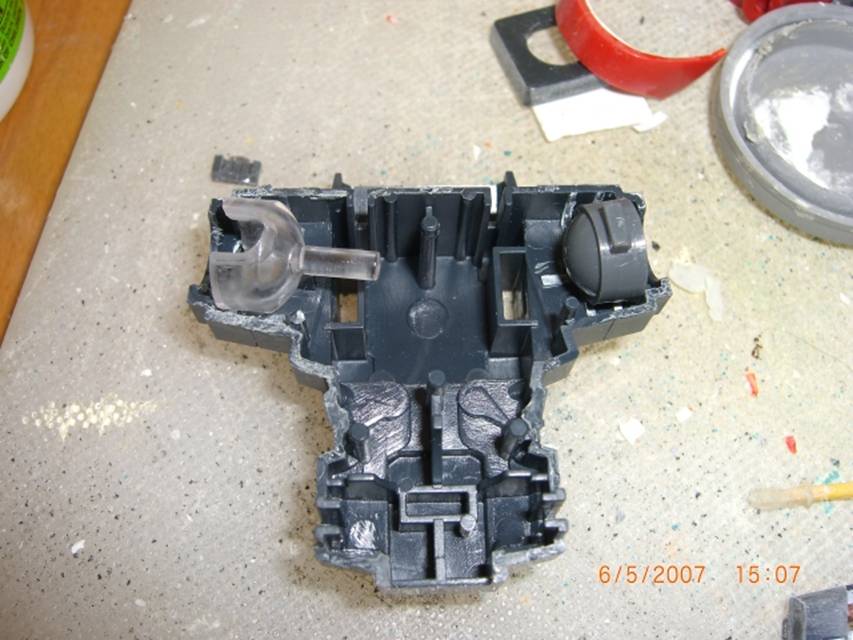
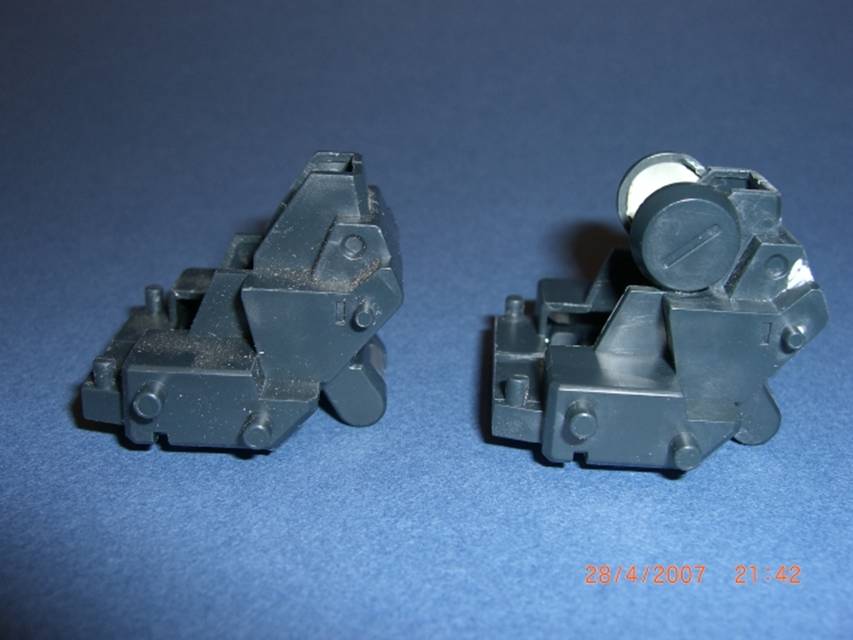
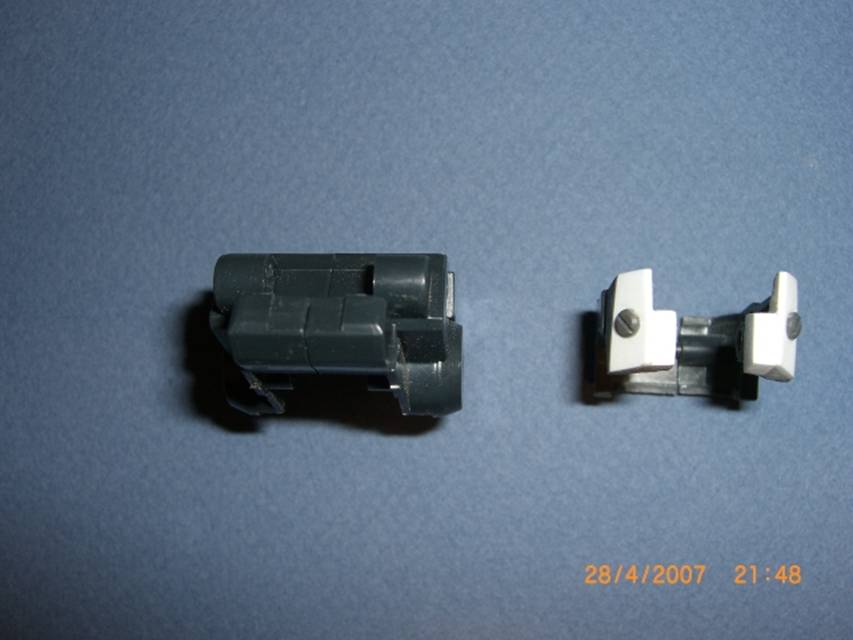
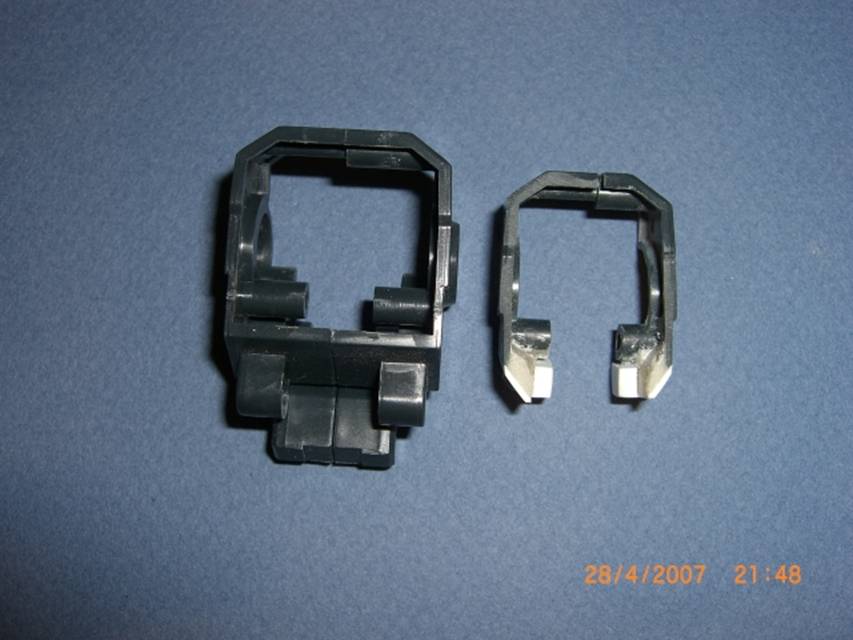
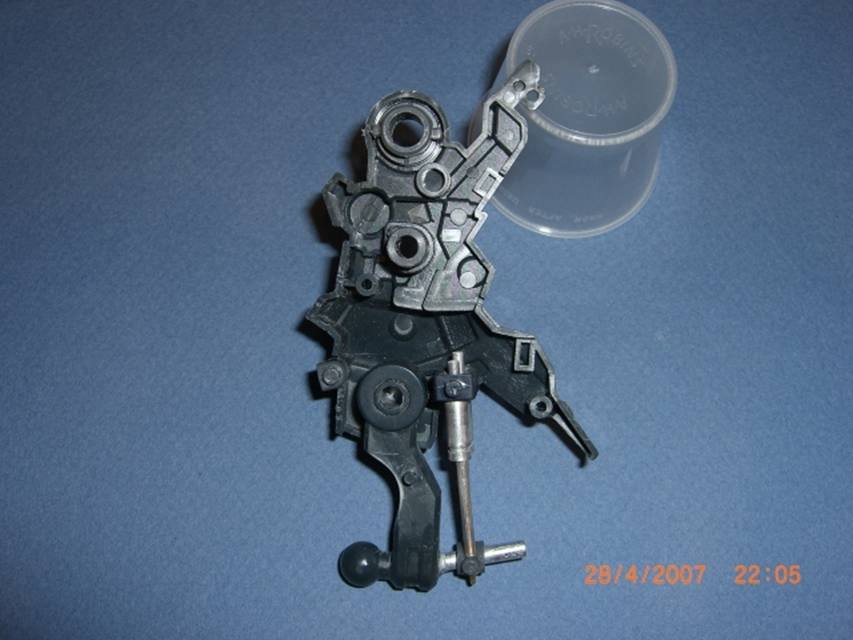
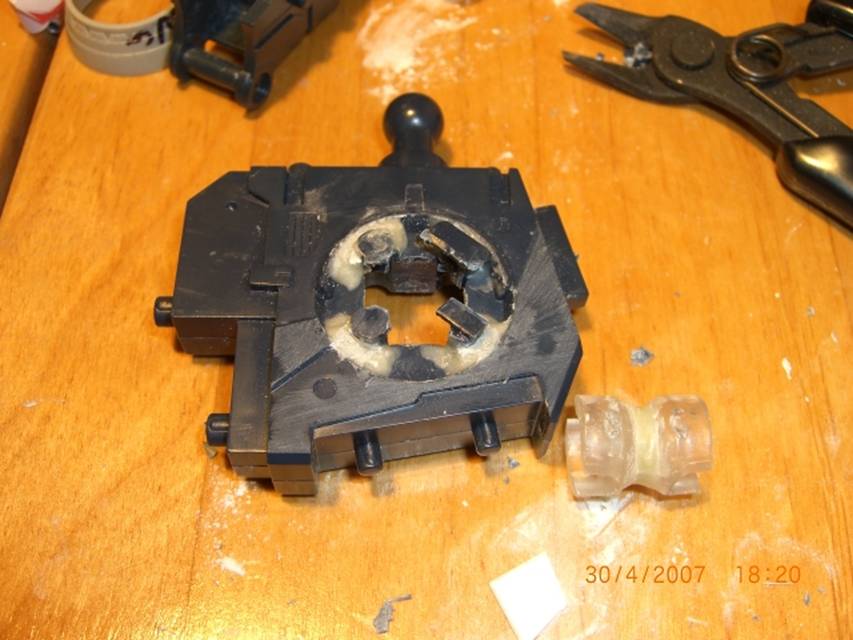
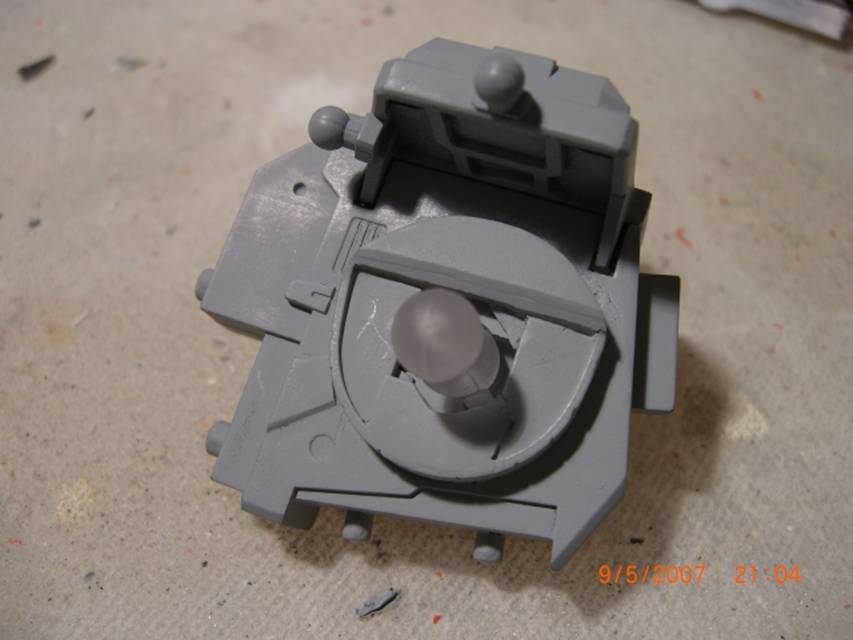
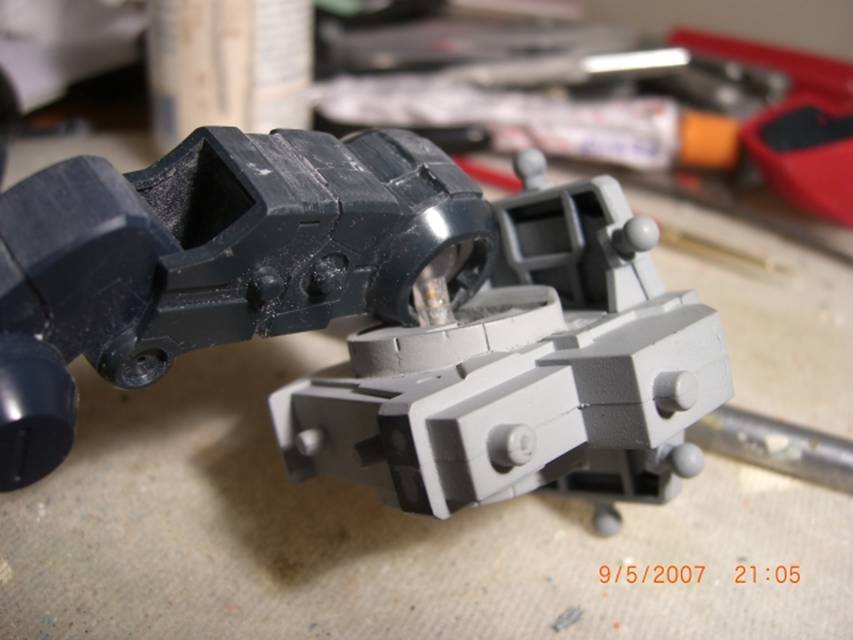
Hips don’t lie
Another “joint” of contention is the hip. Hip splay can determine the range of dramatic action pose you can get, and there are a number of ways to achieve it. Planning to display the Sazabi in flight over a mirror, I couldn’t afford anything too gimmicky. Whatever course chosen had to look good from all visible angles. From modifying the TallGeese hips, and the extra room the much larger kit offered, I settled on a double ball joint mod. I was unable to use practically any of the original ball joint block due to the replacement joints I used, which left the joint looking pretty ugly if it were ever seen. The first image below shows the acrylic double joint cups, joined by SGT, and retaining clips to hold the cups in place. When using SGT to anchor down ball joint cups you have to be very careful not to “freeze” the cup—like I did on the chest/shoulder joint. I spent a fair amount of time building a fairing to cover the mod done to the hip. Copious amounts of styrene, SGT, and a part from another kit went into rebuilding this area. The finished product hides the joint, and the increase in hip mobility is stunning. While giving the hips a tad more front to back splay (really not a weak point), this more importantly adds the ability to raise or lower the hip sockets independently. Though the Sazabi will never kneel like the TallGeese, it can still get a lot more motion and look good doing it. Since the Sazabi had the lower three vertebrae fused (stupid injury from its younger days trying to impress girls—blew out its back and developed sciatica) and therefore has ABSOLUTELY NO waist twist at all, any sort of running or striking pose results in the torso being tilted from the leg height difference. Raising or dropping the hip sockets independently helps considerably with this—as seen in the final product. The last picture shows the splay angle was at least doubled, which should be interesting. Note the brass rod visible through the clear acrylic to keep the hybrid joint solid and strong.
Weapons
A few mods here—I extended the barrel about 1 cm, and replaced the detail on the front top of the barrel with an aluminum tube and Max pipes. I also used a few Kotobukiya detail parts to replace a really badly molded part on the back of the rifle and dress it up a bit.
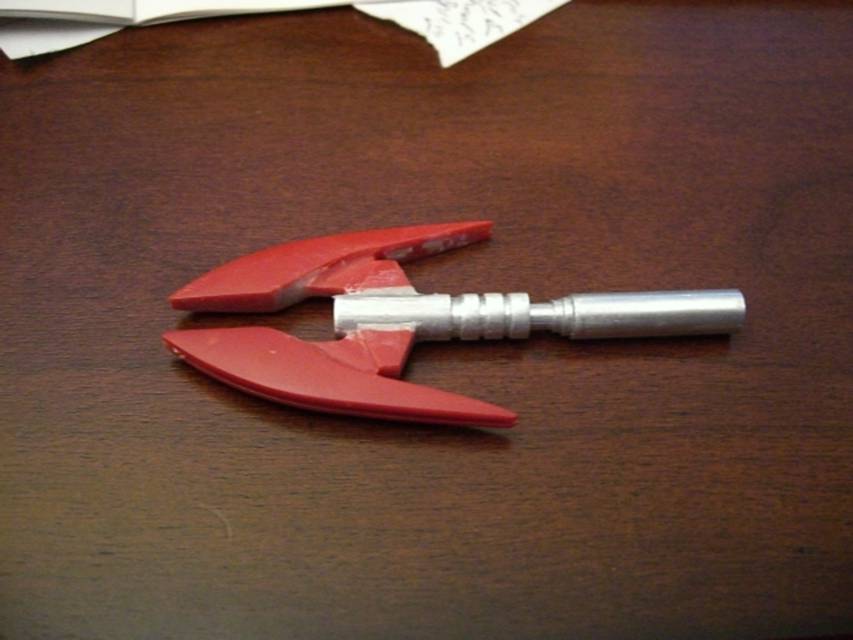
The heat hawk was a mess. The kit hawk has a silly extending gimmick, not seen in the anime. Gone.
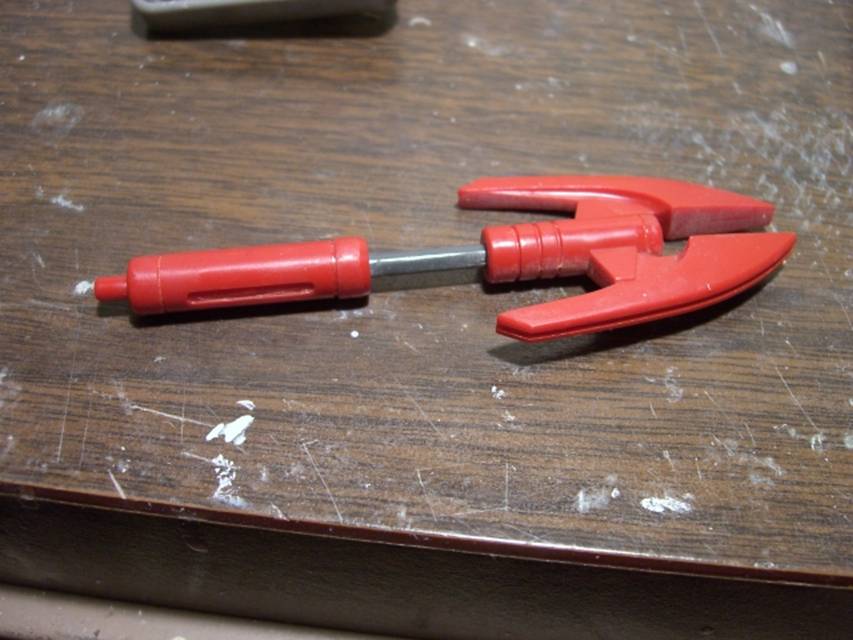
Since I wanted the kit to be able to hold the hawk without the dorky peg (and the B-club hands don’t allow for pegs anywho), a magnet was the solution—3 to be exact. Replacing the plastic handle with a hollow aluminum tube allowed me to mount a neo super magnet from K&J Magnetics in the handle. Another magnet was mounted in the shield interior, and a third was cast into a modified left B-club hand. Now I can switch the hawk from shield to hand, and with the strong magnets, it stays put. The key here was making sure the polarities worked out so the hawk would stick to either the hand or the shield. Minor, but important detail! The edges of the hawk were also trimmed to match the anime profile better.
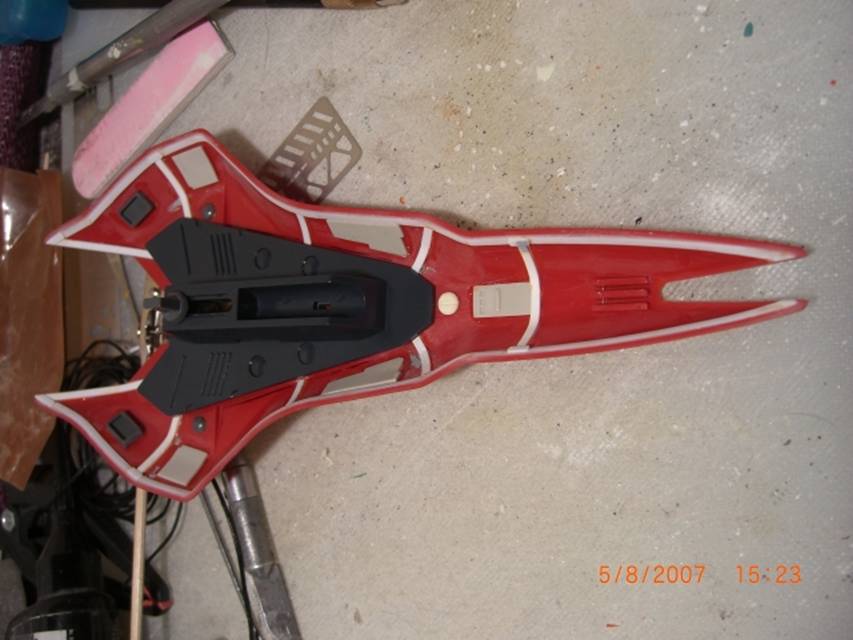
Painting
For paint I went straight with the anime scheme, using Gunze Sangyo Red Madder for the darker red areas, and a custom "Char Salmon" of Red Maddder, white and a touch of yellow. The pre shading base coat was simply Krylo rust colored primer, which allwoed for subtle preshading with little effort. The interior frame was painted with shades of Alclad II metallizers, using Steel for the majority of the frame, and Magnesium on the lighter joints and hands to match the anime. The knuckle joints were brought out with Testors's silver, which gives a cool contrast. For thrusters, combinations of Pale Burnt Metal, Magnesium and Gold Titanium Alclad II were used. The kit was sealed with FFA, then I applied an enamel wash to bring out the panel line details.
The Anime—Char’s Counterattack
Typical of Zeon “glass jaw” school of mobile suits, and vaguely reminiscent of another hot rod, the Sazabi is overpowered and under armored. Paint a Kampher red, and it is the Neanderthal for the Sazabi’s Homo Sapiens. Blazing speed, crappy beam sabers, and enough armor to deflect ripe bananas but not much else, this suit seems to thrive on dropping the hammer and packing a punch. Some comments have been made as to the inadequacy of Char’s shield in the kit as looking too flimsy. I’ll go one better—in the anime, it is flimsy, taking exactly one glancing shot from the ν Gundam before instantly vaporizing. When Amuro busts out the can of whoopass mano a mano on Char, the Sazabi is coming apart like a nervous bride who’s caterer didn’t show up. Face it, the Sazabi and Char were badly outclassed by Amuro and the ν &nu. BUT, and it is a big but, (like Vida Guerra’s), there absolutely wasn’t anything or anyone else that could touch the big red beast.