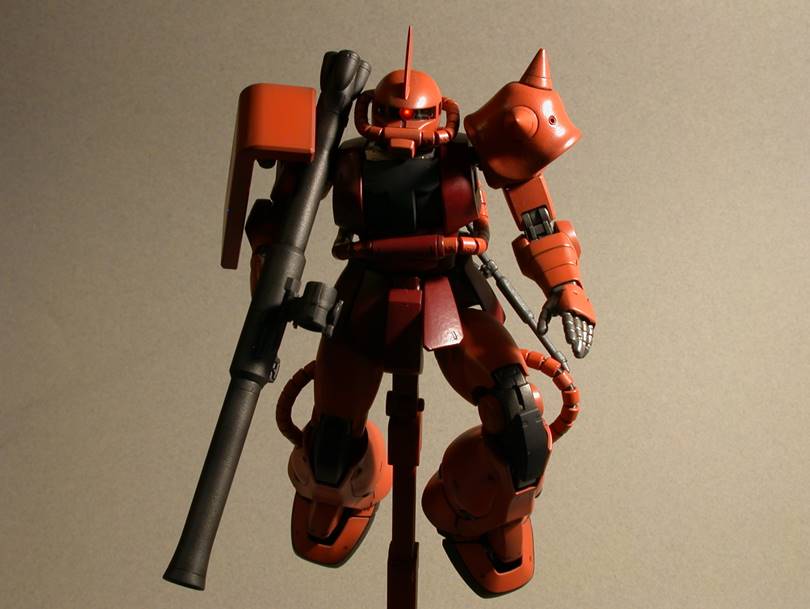
1/100 MG Char’s Custom MS-06S Zaku II
v2.0
After completing the Sazabi, I
wanted to do a more straightforward, bordering on OOB (out of box) build.
This is as close as I got. For me, OOB means really minor
modifications--like reshaping the shoulder pauldron massively and fixing the
"Girl from Kentucky teeth" gaps in the front skirt armor. These
aren't exactly like the Ako mods in that I'm not trying to jazz up an OYW kit
too much, but just trying to get the outer mold lines correct. I think
this does make the point that it takes very little effort to achieve the most
important mods for this guy, though.
No, I'm not altering the feet. They actually don't look too bad compared to
what they are supposed to look like, and some of the mods I've seen are a
little too reminiscent of Michael Phelps to make me comfortable...
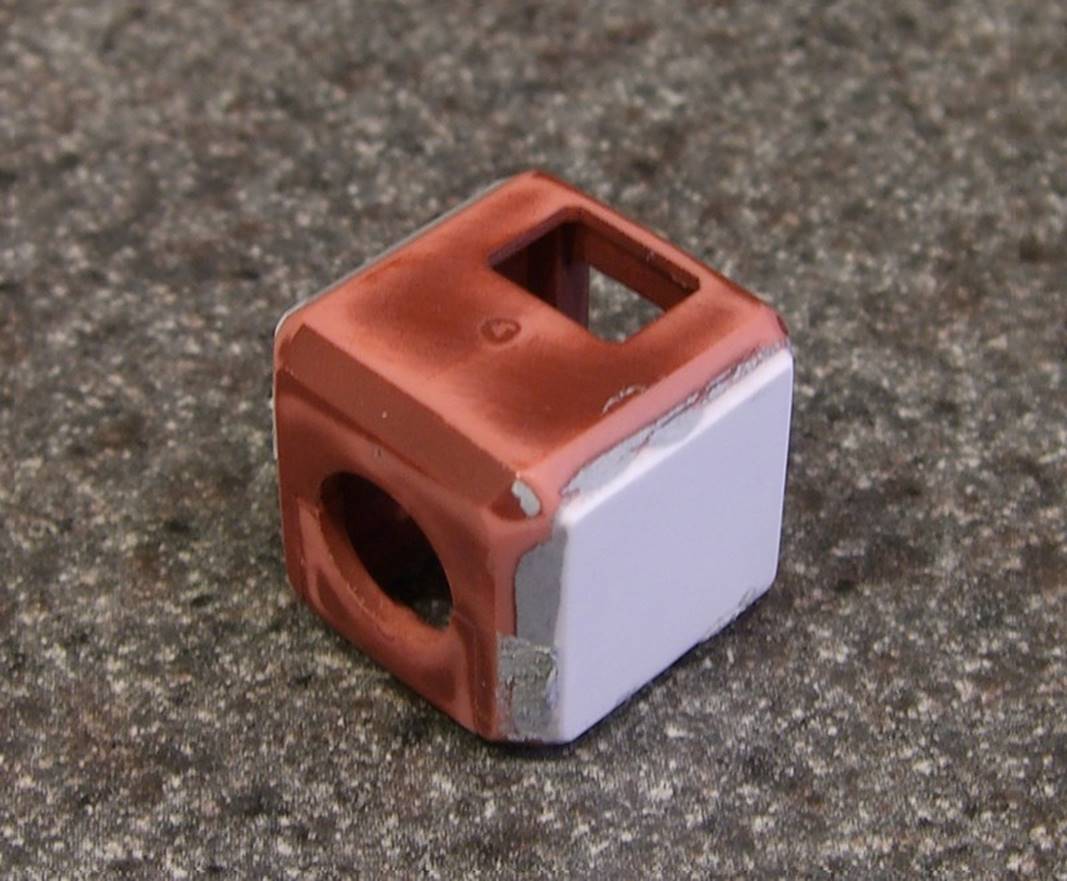
Head
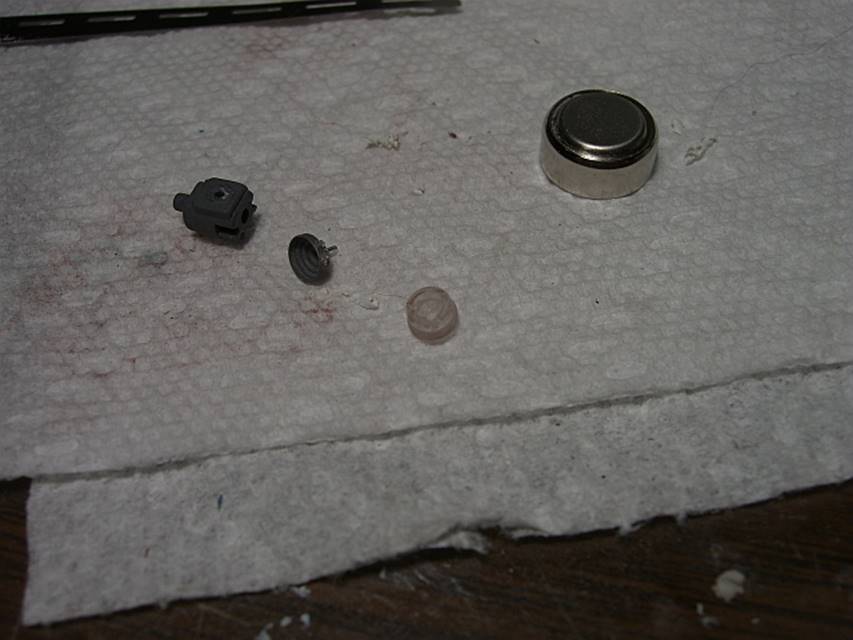
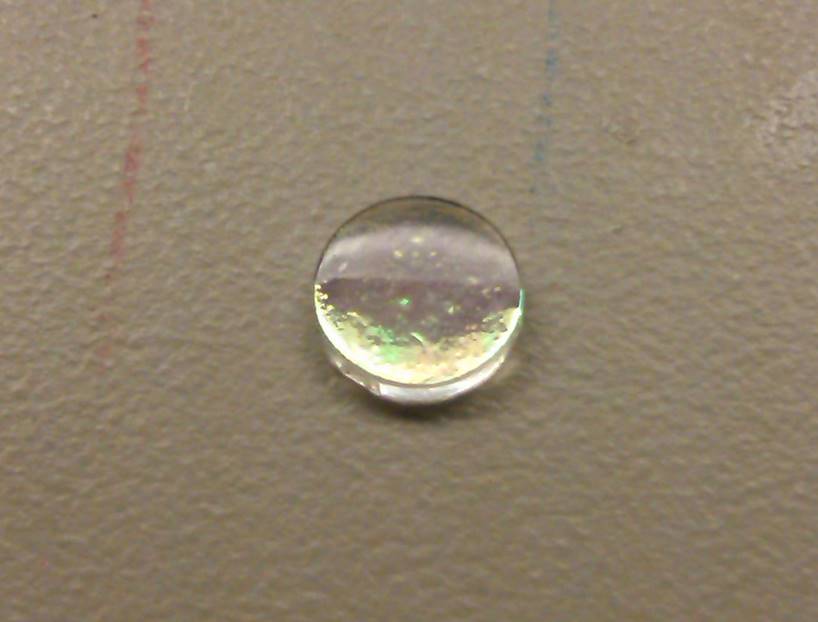
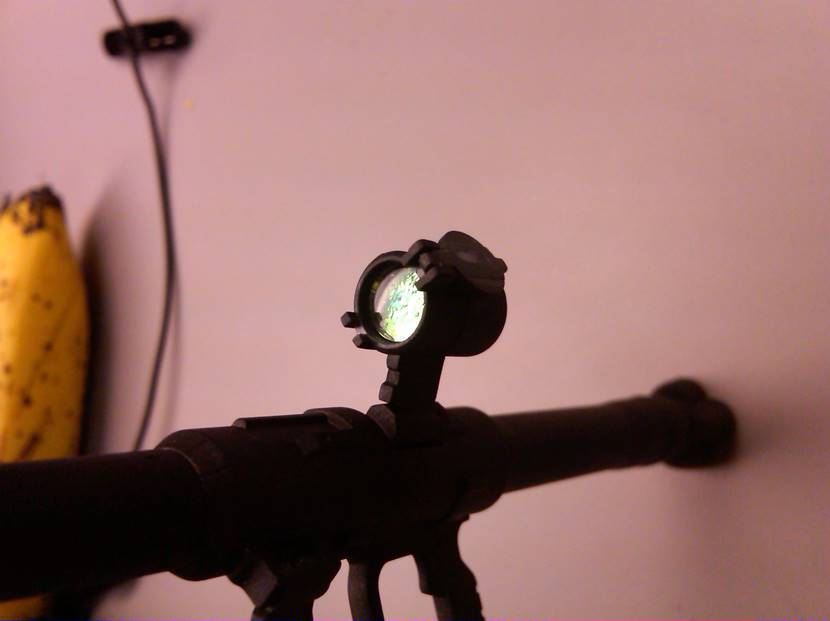
I was torn on this one between lighting and using a nice detail up part for the mooneye lens. Here is the detail up part with the kit monoeye block and with a pink rhinestone inserted for the lens—4mm in diameter. Yes, that’s a standard 357 size button cell for scale:
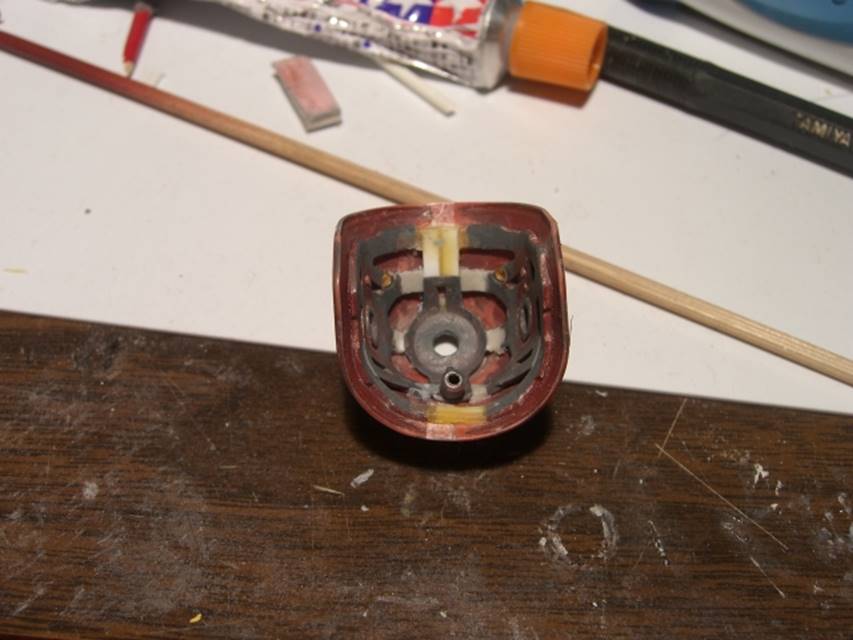
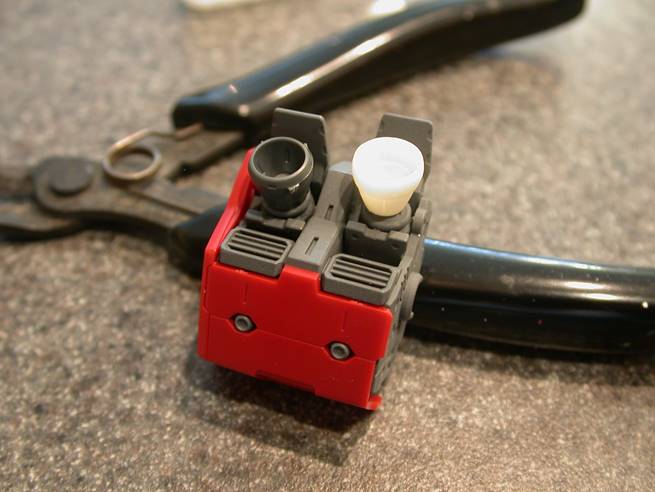
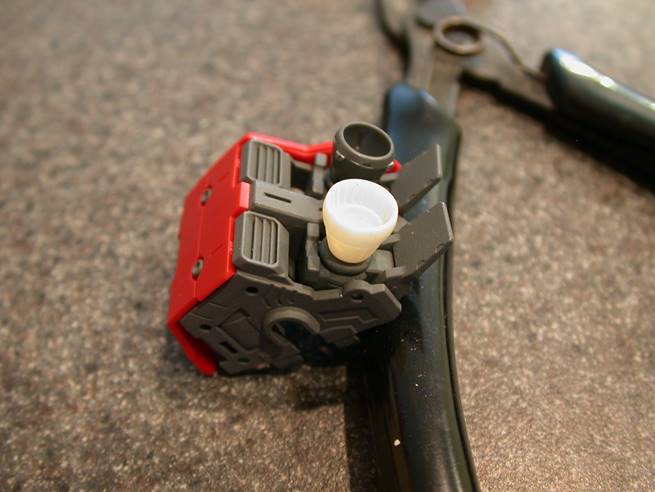
After seeing how little of the detail part was visible, I chose to go with the lighting approach. Instead of using a standard LED as I’ve done on all the others, I went with a micro surface mounted technology (SMD) LED, the first time I used one of these. Thanks to Tetsujin, I was able to get the process down. Here’s the detailed process and results for this build. Power again comes from a single 3V coin cell fitted into the left side of the chest (the cockpit is on the right), with the super thin magnet wires wrapped/glued around the pivoting part of the monoeye mechanism and fed through to the back of the head and out of sight. I plan to alter this, as it is putting too much wear and tear on the left chest door paint. I later routed out the back/backpack for easier access and potentially larger batteries. Shoving tiny batteries in through the cockpit door really limits the power options... I’m also retaining a future option to run wires down a leg to an external adapter. As I ultimately found out shortly after completing the build, the wiring was indeed too fragile and the LED is currently inoperative. But it was cool while it lasted:
Armor Skirt
This was a very simple piece of work, adding styrene shims to the front pieces and widening the codpiece. The inner edges were done with SGT since they are triangular and thin, and SGT is really outstanding in that sort of application. Before:

After

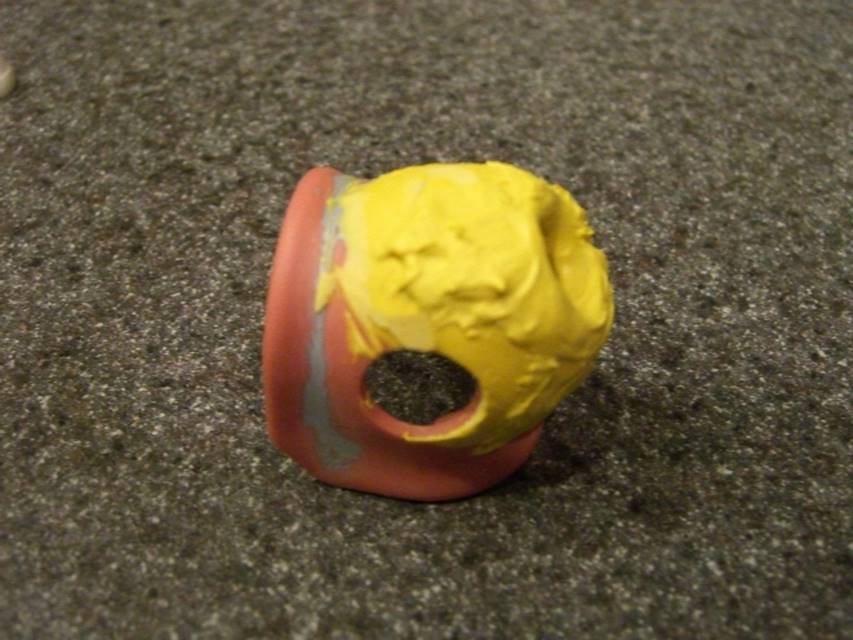
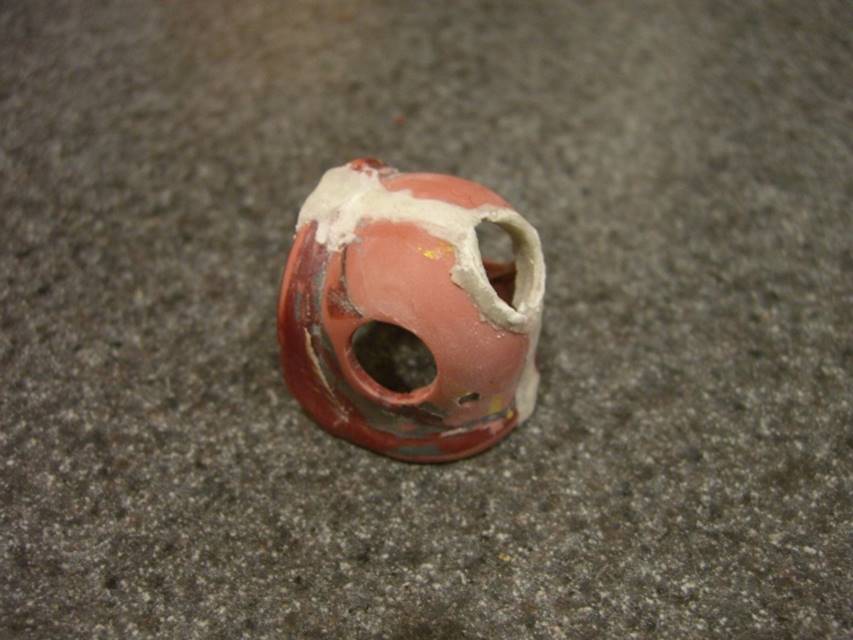
Shoulder Pauldron
This is where I spent the majority of time on the kit. In
short, it was chopped up, both internal frame and external shell, with the
torso side flange removed to shorten it, then removed again to make it about
the same size. Ultimately, I pretty much ended up making it front-to-back
wider by about 3 mm, and thickening the curvature around the top spike a bit,
maybe 1-2 mm tops. The widening was done simply with styrene strip, and
the thickening with Mori Mori Polyester Putty. Here’s an embarrassing montage
of sorts of all the fail I achieved before settling on the final version.
It shows the original and the mutilations mutations I went through, with
some comparisons to the v1.0 MG and 80’s kit pauldrons. None of these are
the final shape…
More Mori Mori.
Screw Mori Mori, go with SGT and a widening strip…
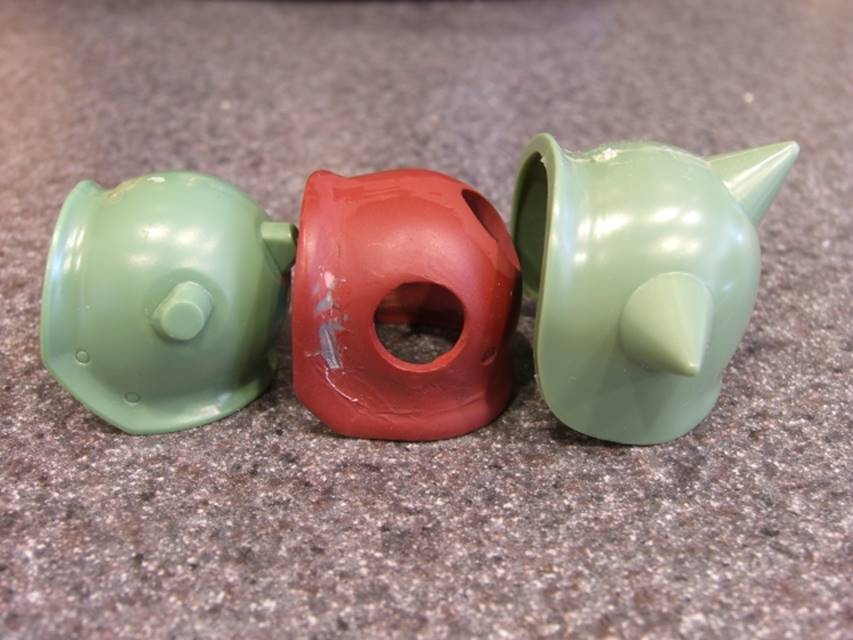
Three Generations: MG V 1.0, my modified MG v 2.0, and the granddaddy goofy MSG version.
Similarly, the shoulder pauldron interior frame was mauled/modified to fit the new outer shell. This was a fairly extensive chop chop/reglue job, but overall not too bad as the part is very well hidden. That said, I’d know if there were ugly seams on the part, so it got the same level of finish as everything else. The white (plastic) and gray (SGT) show how it was expanded.
As a result of all this mucking around the shoulder block needed widening a bit to fit better. With the internal frame rebuilt, it is fairly snug:
Detailing
Another little thing done to dress up the surface was drilling out all the circular indentations and putting in small hollow beads. Gives a more 3-D look.


Hips Dysplasia
A real annoyance of this kit’s design is the shallowness of the hip socket on the crotch side. The dang legs simply fall out, or slip when you try to do some cool poses. The simple fix here was to lightly coat the hip pegs with super glue, which seems to be providing enough grip to hold them in place.
Backpack
I barely count doing this as a md anymore, it is such second nature—replacing the kind of thick, lumpy kit thruster bells with either metal or resin replacements. You can see the results below, and it is a simple but very strong change to make a kit go from toy to model. In this case, I can’t recall if the resin piece I used was a recast of a thinner metal bell, or a plastic bell I had reshaped and then cast. Either way, much better than the kit bells.
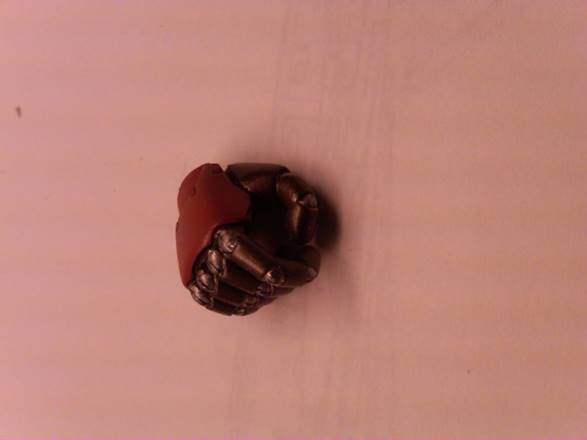
Weapons/Hands
No real mods here—I added iridescent film to the weapon optics. Very cool, cheap and easy. The film was glued onto the backside of the lens using Future Floor Polish.
The B-club right weapon hand was modified using neo super magnets. This allows easily removing the fingers so weapons can be swapped, but provides more than enough grip to hold any weapon.
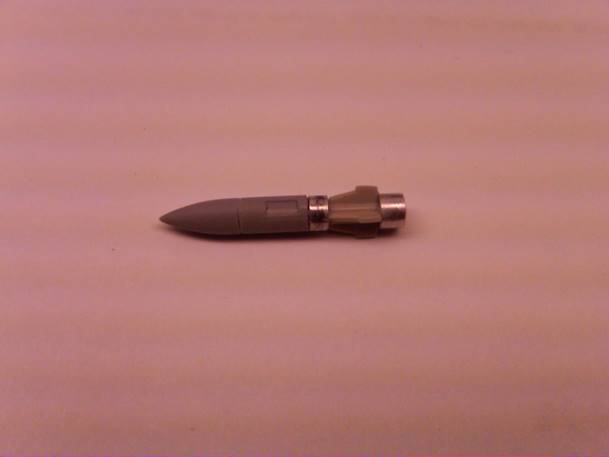
A couple other things—the kit directs painting the Heat Hawk purple and yellow. Over my dead body. I also needed to make one 280mm bazooka rocket, which was scratch built from aluminum tubing and spare 1/48 scale missile parts to match the lineart on MAHQ. I made a rocket plume for the bazooka round out of Great Stuff expanding foam, which was then painted using a variety of colors over the primer. I basically used the method GameraBaenre details here, but modified it a bit as I needed a relatively straight, tapering plume. The key was making the right metal frame—in this case a helical shape for the expanding rocket plume—underneath to support the foam as it cured, and to make sure it would plug nicely into the bazooka tube.
Painting
For paint I went straight with the anime scheme. The kit was primed with Krylon and Duplicolor rust. The maroon areas were painted with the RailRoad Color’s Wisconsin Central Maroon enamel, and a custom "Char's Salmon" of Red Madder, white, black and a touch of yellow was mixed according to the kit instructions—more or less. The pre shading base coat was simply the Krylon rust colored primer, which allowed for subtle pre-shading with little effort. On the black parts (knees, chest, elbows, and feet bottoms) I used Model Master Aircraft Interior Black enamel, which is not a true black, but a super dark gray. The interior frame was painted with shades of Alclad II metallizers, using Steel for the majority of the frame, and Magnesium on the lighter joints and hands to match the anime. Straight Gunze Red Madder was used on the backpack. The knuckle joints were brought out with Testors's silver, which gives a cool contrast. The backpack thrusters were finished with a combination of Alclad II Pale Burnt Metal, Magnesium and Gold Titanium, while the smaller thrusters around the ankle were done with Model Master Steel. Where I applied a wash, the kit was sealed with FFA then given an oil wash to bring out the panel line details. The final kit was flat coated to even out the finish.
Decals
Left them off. I wanted to build this old school anime style, and in MSG, there are no discernable markings on his Zaku.
One final note—this is the only mobile suit I can think of that Char pilots in MSG that Amuro doesn’t trash…maybe shoulda stuck with it!